Email FAQ
Below are a series of Frequently Asked Questions (FAQ) that are often asked at the Gina Cody School Service Centres.
For detailed information regarding ENCS User Accounts and how to obtain one, please visit www.concordia.ca/it/services/encs-user-account.html.
For Service Desk locations and details on how to Request Support, please visit www.concordia.ca/ginacody/aits/support.html.
Email FAQ
ENCS email forwarding can be set up in Webmail (requires ENCS username/password) by following the steps below:
- After logging in, expand the “Mail” item in the top menubar, and select “Filters” from the dropdown menu.
- Select “Forward”.
- Type the address(es) you want to forward to in the text box.
- If you want to “Keep a copy of messages in this account?” (which is not recommended), you can check the related box. In that case, you must monitor your ENCS mailbox to avoid going over quota.
- Click the “Save” button to apply these new settings. However, forwarding is not yet enabled.
- Select “Filter Rules” in the sidebar, then click on “Disabled” next to “Forward”. You should see the “x” turn into a checkmark, and the word “Disabled” will disappear. Now your forwarding is enabled.
- Make sure that the rules are in the correct order, and drag them to change the order if necessary. In particular, you might want to set aside spam and blacklisted senders first, so you don't forward those messages.
If you don't want to use Webmail to manage your mail filtering, here are some alternative ways to set forwarding, all of which use SRS (Sender Rewriting Scheme), which we recommend:
- Directly via a “.forward” file:
"|/local/bin/fwd your@other.address"
- From your “.procmailrc” file:
:0
| /local/bin/fwd your@other.address
- In a manually-maintained SIEVE script:
require ["vnd.dovecot.pipe"];
pipe "fwd" ["your@other.address"];
Again from Webmail:
- After logging in, expand the “Mail” item in the top menubar, and select “Filters” from the dropdown menu.
- Click on the checkmark next to the “Forward” rule; the checkmark will turn into an “x” and the word “Disabled” will appear. It's not necessary to change the settings inside the rule; you can leave them in place in case you want to re-enable forwarding later.
Alternatively, if you've set forwarding manually in a “.forward” file, in a “.procmailrc” file, or in a manually-maintained SIEVE script, just delete the forwarding commands that you added.
From the Webmail interface, after logging in:
Expand the “Mail” item in the top menubar, and select “Filters” from the dropdown menu.
Select “New Rule” in the sidebar.
Give your rule a name in the “Rule Name:” box, e.g. “Default mailbox” or “Hiring Committee”.
If you want to deliver all of your messages (that were not caught by a previous rule) to a different folder, set up your condition as: ALL of the following, field “Size”, “Greater than”, “1”.
If you want to file only some of your messages into a different folder, then set up the condition(s) as you please; clicking on the question mark symbol next to each item will bring up information about that item.
For “Do this:”, select “Deliver to folder...”, then select the folder you want to use; the interface will allow you to create a new folder at that point if you wish.
If you want to flag matching messages as well as refile them, check the wanted flag names. It's not necessary to select any flags.
If you want to file just a copy of each message, and then keep processing it, possibly saving it again into another folder, you can uncheck the “Stop” checkbox. Note that this is rarely needed; normally you want to stop processing after filing the message.
Click on the “Save” button. This will save and activate your new rule, and return you to the Filter Rules.
If your new rule is in the wrong order with respect to the other rules, you can move it by dragging it up and down. You can disable it by clicking on the checkmark, edit it by clicking on the pages symbol, or delete it altogether by clicking on the trashcan next to the rule name.
Yes — click on the gear symbol in the top menu bar, then from the dropdown menu, select “Preferences”, then “Mail”.
Next, in the new page, under “Mailbox”, select “Mailbox Display”.
Finally, under “View or mailbox to display after login:” you can select the folder you'd like to see.
Signatures typically consist of contact details which automatically appear at the bottom of each email message you send.
To create an email signature for your ENCS account, from the Webmail interface, after logging in:
- Expand the settings item (gear symbol) in the top menu bar, and select “Preferences” then “Mail” from the dropdown menu.
- Under “General”, select “Personal Information”.
- Fill in the “Your signature” box (near the bottom of the page; scroll if necessary) with your desired signature text.
- Click on the “Save” button.
If there are other changes you want to make to your settings, such as setting your full name for the “From:” header of messages you send, you can go ahead and make them, remembering to “Save” your updates each time.
Note that you can have multiple “identities” (involving setting your full name and signature differently) for different purposes. Most people have only a “Default identity”, but if you want to create and edit others, use the identity items near the top of this page.
No, your ENCS email quota (87MB for all users) cannot be increased. When your inbox folder is full, new email messages will be bounced back to the sender, and you will not receive them. Therefore, please monitor your ENCS email regularly or forward your ENCS email to another address.
If you expect to receive a lot of mail, and have trouble keeping your inbox from becoming full, you can redirect the incoming email to another email folder — the other mail folders consume your “home and web” disk quota, which is much larger
than your “inbox” quota.
It's possible that your inbox is still over quota. You can check this using the ENCS web-based quota checking tool.
If that's the case, the reason is usually that old messages have not been permanently removed from your inbox, but rather they are just marked as ‘deleted’.
The solution to this problem is to purge your “deleted” messages (which are really only flagged as to be deleted), to really delete them. To do this, log into Webmail (requires ENCS username/password), and:
- Make sure you're in the “Mail” interface (click on “Mail” in the top menu bar if necessary).
- Go to the folder you need to purge by clicking on its name in the left sidebar; usually this is “Inbox”, at the top of the left sidebar). Messages flagged as deleted should appear in the summary with a line through them.
- Select the “Other” dropdown menu. This is the item right above “Date”, not the “Others” item in the top menubar! In the resulting dropdown menu, click on “purge deleted”.
If you are unable to purge the deleted messages using WebMail, you can try moving your inbox contents to your Unix home directory.
In the instructions below, replace “username” with your ENCS username, and “u” with the first letter of your ENCS username.
- Log in with ssh to the host “login.encs.concordia.ca”
- Move your inbox folder contents to a new folder in your Unix mail directory:
mv /var/spool/mail/u/username ~/mail/old_inbox - Refresh the display of your mail folders in your mail client. You should see a new folder named “old_inbox”.
- You can now use your mail client to move or delete messages in “old_inbox”.
- Once you've recovered all useful messages from “old_inbox” and moved them to other folders, you can delete that folder.
In the instructions below, replace “username” with your ENCS username, and “u” with the first letter of your ENCS username.
Recover deleted email in Inbox folder
- Before you start, close all of your email clients.
- Log in with ssh to login.encs.concordia.ca.
- Go to the snapshot directory inside the parent directory of your mail folder:
cd /var/spool/mail/u/.snapshot
Note: you will have to type the path in full: the word “.snapshot” will not be auto-completed by pressing the tab key. - Show your inbox in all of the snapshots, listed in chronological order:
ls -altr */username and select the snapshot that is closest to (but before) the delete time (e.g. “hourly.0”). - Copy the selected file to your “mail” directory, for example: cp hourly.0/username ~/mail/recovered
- Now you can restart your mail client, and refresh the display of your mail folders.
- You will see a new mail folder named “recovered” via WebMail or any other email client. Look there for the missing messages, and move them to a more appropriate folder.
- When you're done, you can safely delete what's left in the “recovered” folder, since it is duplicated in your regular inbox.
Recover deleted email in folders other than Inbox
Under Windows, your mail folders (other than “inbox”) are on your “U” drive (Unix home directory), in a folder called “mail”.
To recover mail in a “non-inbox” folder (for example: “Sent”), right click on the “mail” folder in the “U” drive and browse the snapshots for older versions of that folder. Under Unix, those same snapshots are available in the directory “/home/u/username/mail/.snapshots/”.
Note: “.snapshots” will not autocomplete, so you must type it explicitly.
In both cases, once you've found a satisfactory snapshotted version of your damaged folder, copy it to the “mail” folder under some other name (such as “recovered”), then refresh your mail client. Look in the “recovered” folder for the messages you wish to undelete, and move them to an appropriate folder.
When you're done, delete the “recovered” folder, since the rest of its contents are duplicates of the undamaged part of your original folder.
Large attachments can cause problems for email servers, especially when sent to a large number of recipients. Mailing lists, for example, often reject very large email messages. To send a large file via email, you must upload the attachment to the ENCS File Sharing Service and send the link via email. The email recipient will simply have to click on that link to download the attachment.
How to access the ENCS File Sharing Service:
- Visit https://fis.encs.concordia.ca/share
- Log in to the service with your ENCS username and password.
- Click on “Browse“ and select the file to upload.
- The name of the selected file appears next to the “Browse” button.
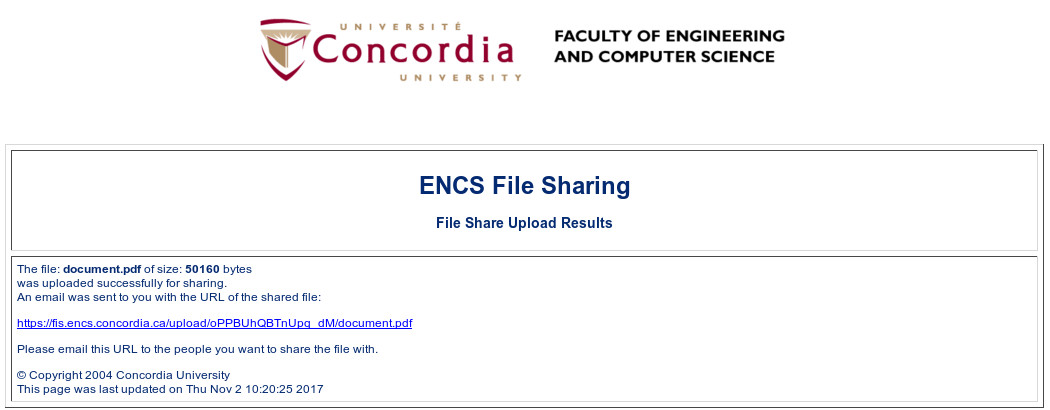
- Click on “Upload” to upload the file and create the shareable link.
- A link to the uploaded file will appear on the screen.
- An email containing the link will be sent to your ENCS email address.
- Send the link to the document via email.
Example:
- Visit https://fis.encs.concordia.ca/share
- Log into the service with your ENCS username and password.
- Click “Browse” and select the file to upload.
The name of the selected file should appear next to the “Browse” button.

- Click on “Upload” to upload the file and create the shareable link.
A link to the uploaded file will appear on the screen.
An email containing the link will be sent to your ENCS email address.
- Send the link to the document via email.
One of the ways to back up your ENCS email to an external device is to use an email client, like Mozilla Thunderbird.
- Configure an email client (Mozilla Thunderbird) on your personal machine.
- Create a local folder:
- Right click your account name in the left hand side bar within Thunderbird
- Select “New Folder”
- Enter a name for the folder and choose its parent folder from the drop down list
- Click on “Create Folder”.
- Right click on the local folder you created and click on “Properties”
- Verify that the folder’s Location is on your computer
- Copy (or drag and drop) the emails you wish to back up from your inbox to the local folder you just created.
Another method is to back up your ENCS Inbox to your home computer.
In this example, “username” represents AN ENCS username and “u” is its first letter.
- Log in to login.encs.concordia.ca.
username’s ENCS Inbox is located at /var/spool/mail/u/username - Create a folder to store your back up file, for example /home/u/username/Inbox_backup.
- [grace] [/home/u/username] > mkdir Inbox_backup
- [grace] [/home/u/username] > cp /var/spool/mail/u/username Inbox_backup
- The above commands created a file named username in the Inbox_backup directory.
If you would like to use Mozilla Thunderbird to access the contents of your email backup, e.g., /home/u/username/Inbox_backup/username
Copy the username file and place it in the system’s Mozilla Thunderbird Local Folders.
Right click on the Local Folders in the left hand sidebar and select “Settings” to determine the location of the local directory.Launch Thunderbird.
A folder named Inbox_backup should appear in Local Folders containing all of your backup Inbox email.
If you would like to back up email folders other than your inbox, (i.e., Sent, Trash...), those folders are located in /home/u/username/mail/.
- Webmail: select the “plus” symbol at the top right of the message pane, and from the resulting dropdown menu, click on “View Source”.
- Mozilla/Netscape/Thunderbird: “View”, “Page Source”
- Pine: Press “h” to toggle full headers
- Most other clients: https://mxtoolbox.com/Public/Content/EmailHeaders/
While logged into Webmail (requires ENCS username/password), and inside the “mail” interface (select “Mail” in the top menubar if necessary):
- From the left sidebar select “Folder Actions”, and from the resulting dropdown menu, select “Show All Mailboxes”.
- If you have sub-mailboxes, you might have to also (again from “Folder Actions”) select “Expand All”.
- If you still don't see your folder, try (again from “Folder Actions”) selecting “Rebuild Folder List”.
- Subscribed folders (which are shown to you by default) are in normal font, while non-subscribed mailboxes (normally not shown to you) appear in italics.
- Assuming that your “lost” folder was simply not subscribed, to subscribe to it, right-click on its name, and from the dropdown menu, select “Subscribe”. You can also set it to check for new mail, if you plan to receive new mail in that folder.
- You can now (from “Folder Actions”) “Hide Unsubscribed” if you like.
Under some circumstances, very large mailboxes are incorrectly shown as empty when first accessed (“There are no messages in this mailbox”). This happens because some ways to sort a mailbox are very slow.
As a quick workaround, switch to another folder, then switch back. That generally clears it up for your current Webmail session.
To stop the problem permanently, you need to change to another sorting method. While logged into Webmail:
- Expand the settings item (gear symbol) in the top menu bar, and select “Preferences” then “Mail” from the dropdown menu.
- Under “Mailbox”, select “Mailbox Display”.
- Either set “Default sorting direction” to “Ascending”, or, set “Default sorting criteria” to anything other than “NONE”.
If you like to see newer messages first, “Date / Descending” is a good choice.