User account – Gina Cody School of Engineering and Computer Science
All faculty, staff, and students within the Gina Cody School of Engineering and Computer Science are given an ENCS user account. The username and password associated with the account are required to access systems, applications, and computers managed by the School.
Depending on your role within the School, the user account includes
access to data storage space, email, and web space, and may also include the use of some desktop labs and Unix servers.
For more information about your eligibility, read through the documentation below.
Who can use it?
Faculty, staff, and students within the Gina Cody School.
How much does it cost?
There is no cost associated with this service.
How to get it?
- To set up your user account for the first time, submit an IT Service Desk Support Request or email help@concordia.ca.
- To change your existing ENCS password, visit the password reset page (requires ENCS username/password).
- If you cannot remember your ENCS password, submit an IT Service Desk Support Request or email help@concordia.ca.
- To check your available disk space and email quota, use the user quota check (requires ENCS username/password) tool.
- To use the ENCS webmail service, sign in to its login page using your ENCS username and password.
- To share files online, use the file exchange utilities.
Service availability
24/7
Documentation
Additional services available with the ENCS account:
Disk space on ENCS network drives (also described as network shares) is allocated based on your account type and the groups you are in. Disk quota applies to each segment of disk space, and it is not transferable between segments.
Note that you are entitled to only one “personal space”, even if you have multiple roles in ENCS (e.g., student as well as part-time faculty).
To access your disk space from Windows, use your ENCS account credentials to map the network drive.
To access your disk space on an ENCS-managed Unix/Linux host, simply change to the directory where the disk space is located by using the “cd” command. If you have a user-managed Unix/Linux computer, you can mount the needed filesystems using the CIFS protocol.
The disk space to which you are entitled can be determined using the following table:
Type of account/type of space |
PERSONAL SPACE |
GROUP SPACE |
||||||
Basic home and web |
|
|
“Facdisk” (research) |
Course support for instructors |
Course project for students |
Research group basic presence | Admin role and other roles |
|
Undergrad student, course-based Master’s student, non-ENCS student taking supported ENCS course, part-time staff, and guest |
10 GB |
87 MB (note 8) |
N/A |
N/A (note 3) |
N/A |
1 GB or as required (note 6) |
N/A |
N/A |
Thesis-based Master’s student, Ph.D. student |
2 GB |
87 MB (note 8) |
2 GB |
N/A (note 3) |
N/A |
1 GB or as required (note 6) |
N/A |
N/A |
Part-time faculty |
2 GB |
87 MB (note 8) |
N/A |
N/A (note 3) |
1 GB or as required (note 5) |
N/A |
N/A |
N/A |
Full-time faculty |
50 GB |
87 MB (note 8) |
4 GB (note 2) |
300 GB (note 3) |
1 GB or as required (note 5) |
N/A |
1 GB if needed (note 7) |
As required (note 4) |
Full-time staff |
50 GB |
87 MB (note 8) |
N/A |
N/A (note 3) |
N/A |
N/A |
N/A |
As required (note 4) |
Notes:
1. Basic home and web space: This is the default disk space assigned when your personal account is created. It is in three locations: the Windows home, the Unix home, and the Web directory. The disk quota for this space is established based on your status in the School and cannot be increased. Your basic home and web disk quota is shared among the three locations mentioned above.
2. Thesis space: All Ph.D. students and thesis-based Master's students get 2 GB of extra space for their thesis work. Full-time faculty members who are supervising thesis students get an additional 4 GB of space, which is not transferable to students.
3. “Facdisk” space: This is usually used for research and is allocated to full-time faculty members. Professors can choose to share their “facdisk” quota with students or other School users.
4. Admin role space: Admin role accounts are created on request of the Departmental Administrator, for the purpose of administration support. 10 GB are usually granted as a default; more space can be added if necessary. It serves for sharing files among group members (possibly only one person) and for email if desired; interactive logins are not possible.
Other (non-administrative) role accounts are sometimes created, for example to support organizing a conference. Usually 1 GB is granted for these.
5. Course support for instructors: A course support account is created upon request of the course instructor, and its associated disk space contains the course material created by the instructor (and tutors, if the professor requested access for them). The group “account” associated with this disk space cannot be used for interactive logins. The files saved in this space are archived after the end of each term and made available to the other professors in the same department, unless the current professor decides to remove his/her course material.
6. Course project space for students: A course project account is created for students registered in a course (either for individual students or for groups of students working together) upon request of the course instructor. Its associated disk space is used by students who require extra space for a course project. The group “account” associated with the disk space cannot be used for interactive logins. Once the course is finished, this disk space is deleted.
7. Research group “basic” space: This space is made available to research groups in order to allow a basic presence within the ENCS structure (for example a web page to represent the group, filesharing space for cooperative work on documents, etc.). The space is in the standard group area and the professors can get 1 GB of space as a default; more space can be negotiated, but in most cases the professor will be asked to use their “facdisk” space instead. A research group “account” is usually not used for interactive logins. It can be shared with other School users.
8. Email inbox: Default incoming mail spool (Inbox) has 87 MB quota; no exceptions are granted. This space is usually accessed via the IMAP protocol (a mail reading agent or webmail). Direct access is possible only from the host login.encs.concordia.ca.
Location of disk space
Users can access the network shares in both Unix/Linux and Windows.
The Unix paths and Windows Drive folders are listed below:
In all cases:
- “u” represents the first letter of the ENCS username
- “username” represents the ENCS username
- “g” represents the first letter of the ENCS group name
- “groupname” represents the ENCS group name
|
Windows Drive letter |
Windows mapping path |
Unix |
Quota notes |
||
|
|
Windows home |
G: |
\\filer-users.encs.concordia.ca\username |
/winhome/u/username |
|
Unix/Linux home |
U: |
\\filer-users.encs.concordia.ca\unix\u\username |
/home/u/username |
|||
Web home |
W: |
\\filer-users.encs.concordia.ca\web\u\username |
/www/home/u/username |
|||
Email inbox |
|
Cannot map |
/var/spool/mail/u/username |
|
||
Thesis |
T: |
\\filer-thesis.encs.concordia.ca\v_thesis\thesis_unix\u\username |
|
|
||
|
“Facdisk” (research) |
R: |
\\filer-facdisk.encs.concordia.ca\fac_u\username |
/private/u/username |
|
|
Admin role account |
Q: |
\\filer-admin.encs.concordia.ca\v_admin\admin_unix\g\groupname |
/admin/groups/g/groupname |
|
||
Other role accounts |
|
|
\\filer-groups.encs.concordia.ca\v_groups\groups_unix |
|
|
|
|
\\filer-groups.encs.concordia.ca\v_groups\groups_unix\g\groupname |
|||||
|
|
\\filer-groups.encs.concordia.ca\v_groups\groups_web |
/www/groups/g/groupname |
|||
|
\\filer-groups.encs.concordia.ca\v_groups\groups_web\g\groupname |
|||||
Other |
Temporary storage |
|
H: |
H:\\filer-nettemp.encs.concordia.ca\nettemp |
/nettemp |
|
Notes:
If you'd rather map a particular group to a drive letter, as opposed to using the already-mapped parent directory for all groups, you must assign your own drive letter.
A group account is used to allow a group of people to share files within the School. It supplies a “group directory”, or “group folder”.
Group Accounts can be issued for academic purposes (teaching or research) or for administrative purposes. The Group Account is revoked once the mission of the group has come to an end (for example, when the course for that group finishes).
All users with an ENCS account are granted disk space for use as web pages.
The location of your personal web page directory is:
Unix/Linux |
/www/home/u/username |
Windows |
W: or \\filer-users.encs.concordia.ca\web\u\username |
The URL is: “https://users.encs.concordia.ca/~username” where username is your ENCS username.
Full details on labs reserved for members of the Gina Cody School of Engineering and Computer Science, including information about hours of availability and access permissions for an individual lab, are available at https://www.concordia.ca/it/services/comp-labs-encs.html
As a GCS user, you are entitled to access GCS managed Linux servers. Full details are available at https://www.concordia.ca/ginacody/aits/public-servers.html
All Gina Cody School students have an email address associated with their ENCS account.
The email address has the format “username@encs.concordia.ca” where “username” represents the user's actual ENCS username.
Students are responsible for checking their ENCS email, either directly or by forwarding it to another address. See FAQ below for instructions on how to forward mail.
Concordia has a central email system designed to enhance communication and collaboration among faculty and staff. This service standardizes Concordia's email naming convention, meaning that all addresses will now follow the format: firstname.lastname@concordia.ca
For more information about the centralized email system at Concordia, visit the faculty and staff email information page.
Gina Cody School faculty and staff also have an email address which is associated with their ENCS account. This email address has the format “username@encs.concordia.ca” where “username” represents the user's actual ENCS username.
It is strongly recommended that faculty and staff either check their ENCS email regularly or forward it to another address, which they check regularly, such as the “firstname.lastname” address mentioned above. See the FAQ section below for instructions on how to forward email.
By default, incoming mail is sent to your inbox folder. Be aware that your inbox folder has a quota limit of 87 MB. If you exceed this limit, further incoming email messages will be bounced back to the sender.
You can check your inbox quota by using the online quota check tool (requires ENCS username/password). Alternatively, you can check it using the “quota” command at the Unix/Linux prompt. Among the items in the output, the one labeled “INBOX” indicates your current inbox quota usage.
The inbox folder is meant only to receive new email before it is moved into other mail folders. The inbox folder resides in /var/spool/mail/u/username, (where username is replaced with the person's actual ENCS username, and u is the first letter of this username), which can be accessed directly by logging into login.encs.concordia.ca. All of your other mail folders (e.g., Trash, Sent, Drafts, and custom mailboxes) reside in the mail sub-directory of your Unix/Linux home directory:
| Unix/Linux | |
| Windows | U:\mail |
Each non-inbox mail folder counts towards your standard (“home and web”) disk quota, not towards your inbox quota. Thus, if you receive a lot of mail or very large messages, you can avoid hitting your inbox 87MB quota limit by configuring your mail to be delivered to another folder; see the Email FAQ section below for instructions.
Sending or receiving large files via email attachments is not recommended. It overloads the mail system and can easily exceed the receiver's inbox quota. Moreover, whenever you send an email message, a copy of the sent email (including any attachments) may be saved in your sent mail folder, which contributes to your own disk quota usage.
To exchange large files (up tp 1 GB) with other people, we recommend using the ENCS File Exchange Utilities. With this tool, you can:
- Share your files with others
- Get files from others
For more information, read the FAQ on sharing large files via email.
Configuring your email client
Access to IMAP/S is restricted: only connections from within Concordia are allowed, including the Concordia VPN, the Concordia wireless network, and of course the ENCS networks. Note that you can also tunnel in with ssh.
To configure your Thunderbird email client, perform the following
- Open Thunderbird
- From the Thunderbird menu (the “hamburger” to the right of the search field) select “+ New” > “Existing Mail Account ...”
The “Set Up an Existing Email Account” window opens
- Enter the following information
- Your name: (Your name as shown to others)
- Email address: encs_username@encs.concordia.ca (Your email address)
- Password: (your encs_username's password)
- Click “Configure manually…”
- Enter the Incoming Server Information as follows:
- Enter the Outgoing Server Information as follows:
- Click “Advanced config”
- Click OK in the “Confirm Advanced Configuration” pop up to create the encs account without testing.
Protocol |
IMAP |
Server |
mail.encs.concordia.ca |
Port |
993 |
SSL |
SSL/TLS |
Authentication |
Normal Password |
Username |
encs_username |
|
Within the ENCS Network |
Concordia Wireless or VPN |
Outside Concordia (no VPN) |
Protocol |
SMTP |
SMTP |
SMTP |
Server |
smtp.encs.concordia.ca |
smtp.concordia.ca |
Use the SMTP server information of your home internet provider |
Port |
25 |
25 |
|
SSL |
None |
None |
|
Authentication |
None |
None |
|
Username |
encs_username |
netname |
The “Account Settings” window opens with “Server Settings” selected
- In Server Settings, click on the “Advanced...” button
The “Advanced Account Settings” window opens
- Make sure that the “IMAP server directory” is empty
- Uncheck “Show only subscribed folders”
- Check “Server support folders that contain subfolders”
- Click “OK” to close the "Advanced Account Settings” window
As Thunderbird version 78+ disables TLS 1.0 and 1.1. you will need to re-enable TLS 1.0 in order to view your encs account’s email,
- From the menu at the top right (the hamburger), go to Options.
- Scroll all the way to the bottom and click on “Config Editor”.
- Skip past the warning.
- Scroll down until you find security.tls.version.min
- Double click on it, and set the value to 1
- Click OK
- Close Thunderbird, and open it again.
To add your ENCS user account to your Microsoft Outlook email client, follow these steps.
1. If the Outlook email client is open, close it.
2. Open up the Control Panel and select “Mail (Microsoft Outlook)”
a. If you cannot find the “Mail (Microsoft Outlook)” in your system's control panel, contact the system's administrator. If your system is managed by AITS, send an email to help@concordia.ca requesting assistance.
3. The “Mail Setup” window appears
a. Click on “Email Accounts...”
4. The “Account Settings” window opens
a. In the Email tab, click on “New...”
5. The “Add Account” window appears
a. Activate the “Manual setup or additional server types” radio button
b.Click “Next”
6. The “Choose Your Account Type” window appears
a. Activate the “POP or IMAP” radio button
b. Click “Next”
7. The “POP and IMAP Account Settings” window appears
8. Enter the following information:
User Information |
|
||||||
Your Name: |
Your name as shown to others |
||||||
Email Address: |
encs_username@encs.concordia.ca |
||||||
Server Information |
|
||||||
Account Type: |
IMAP |
||||||
Incoming mail server: |
mail.encs.concordia.ca |
||||||
Outgoing mail server (SMTP): |
|
||||||
Logon Information |
|
||||||
User Name: |
encs_username |
||||||
Password |
your encs_username's password |
a. Click “More Settings …”
9. The “Internet Email Settings” window opens
a. Go to the “Advanced” tab
b. Under Incoming Server (IMAP):
1. Select “SSL/TLS” as the type of encrypted connections
c. Under Outcoming Server (SMTP)
1.Select “None” as the type of encrypted connections
d. Click “OK”
10. Back in the "POP and IMAP Account Settings" window, click “Next”
11. Outlook will test your settings. If the tests are successful, the a “You’re all set” message will appear
12. Click “Finish”
Launch Outlook to verify that your encs account’s email inbox is visible.
To configure IMAP/S on any e-mail client, use these values
Incoming Server
Protocol |
IMAP |
Server |
mail.encs.concordia.ca |
Port |
993 |
SSL |
SSL/TLS |
Authentication |
Normal Password |
Username |
encs_username |
Outgoing Server:
|
Within the ENCS Network |
Concordia Wireless or VPN |
Outside Concordia (no VPN) |
Protocol |
SMTP |
SMTP |
SMTP |
Server |
smtp.encs.concordia.ca |
smtp.concordia.ca |
Use the SMTP server information of your home internet provider |
Port |
25 |
25 |
|
SSL |
None |
None |
|
Authentication |
None |
None |
|
Username |
encs_username |
netname |
FAQ
Data storage FAQ
First, check your network disk space usage using the ENCS web-based quota checking tool; it requires your ENCS username and password. If you see a red bar in the output, it means that you are over your allocated disk quota in that disk space, and you may have problems using your account until you return below quota in this disk space by deleting some files.
If the disk space in which you're over quota is your basic home and web space, you can use our “bigfiles” tool to find the largest files in this diskspace. To use it, use SSH (e.g., “ssh” or “PuTTY”) to log in to the host “login.encs.concordia.ca”, then type the command “bigfiles”. Depending on how many files you have, it may take a few minutes for results to appear. The results will show you your 20 largest files.
Delete some files, or move them to another network diskspace if you have one, or move them to external storage such as a USB. or move them to the local disk of your workstation (in the latter two cases, be aware that your files will no longer be protected by AITS snapshots, and if your workstation disk dies or you lose the USB key, it may be impossible to recover your files.)
Once you think you've deleted enough files, check your work by once again consulting the ENCS web-based quota checking tool (requires ENCS username/password) to ensure your network drives have enough free space.
NOTE:
The directory “.snapshot” on any network drive (on Windows drive G, U, W, etc., or on your Unix/Linux directories) does not consume any disk quota. It is a system back-up folder that allows users to recover modified/deleted files by themselves.
While “basic home and web” disk space cannot be shared, a faculty member's “facdisk” space can be shared with students or other School users. To allocate some of your facdisk space to another person, contact the Service Desk.
All graduate students registered in a degree program requiring a supervised thesis are granted some disk space in the “thesis” area, which is intended for the storage of any thesis-related files.
Under Unix/Linux, ‘cd /thesis/u/username/’ to reach your thesis space.
On a Gina Cody School-managed Windows host, your thesis space is automatically mapped to drive T.
On a user-managed Windows host, you can map your thesis space via ‘\\filer-thesis\thesis\u\username’.
In both cases, the letter ‘u’ represents the first character of your ENCS username and the word ‘username’ is your ENCS username.
If you have problems, contact the Service Desk.
To facilitate access to your files through different services in varying environments, the files are stored in different directories on the network.
Each user is assigned basic “home and web” space available in the locations described in the table above. Depending on their status and roles, the user may be assigned additional disk space; once again, please refer to the table above.
Files stored on network shares benefit from AITS' backups and snapshots. In many cases, you can also store files on your desktop's local disk, but it's not recommended as files on your local disk are not protected against disk failure and other catastrophes that could arise with your desktop.
If you're using a Gina Cody School analyst managed Windows desktop, all of the drives you need are probably already mapped. If you want to map more drives, or if you're using a user-managed Windows desktop or laptop where you must map the network drives yourself, here's how to do it:
How to map ENCS network drives automatically:
- Download the Map ENCS Drives application to your Windows system.
- Double click on the application.
Any problems should be reported to the Service Desk with screen captures, if possible.
How to manually map a network drive:
- Click Start → Computer
- Select Map network drive.
- Specify the Drive letter for the connection, for instance G:.
- Type in the network path to the share (e.g., \\filer-users.encs.concordia.ca\<encs_username>) you want to connect to, in the Folder space.
- Check Connect using different credentials.
- Click Finish to connect the drive.
- You will be prompted for a username and password. Supply ENCS\< username> and password.
Review the Location of disk space table for more information.
To map a drive from outside Concordia University, you must first connect to the VPN service. Follow the instructions found on the Virtual Private Network (VPN) information page.
Important: To connect to the VPN service you must use your Concordia Netname and Password. Then to map an ENCS network drive, you need to use your ENCS Username and Password.
Once you've connected to the VPN service, you can map your network drive as usual.
Email FAQ
ENCS email forwarding can be set up in Webmail (requires ENCS username/password) by following the steps below:
- After logging in, expand the “Mail” item in the top menubar, and select “Filters” from the dropdown menu.
- Select “Forward”.
- Type the address(es) you want to forward to in the text box.
- If you want to “Keep a copy of messages in this account?” (which is not recommended), you can check the related box. In that case, you must monitor your ENCS mailbox to avoid going over quota.
- Click the “Save” button to apply these new settings. However, forwarding is not yet enabled.
- Select “Filter Rules” in the sidebar, then click on “Disabled” next to “Forward”. You should see the “x” turn into a checkmark, and the word “Disabled” will disappear. Now your forwarding is enabled.
- Make sure that the rules are in the correct order, and drag them to change the order if necessary. In particular, you might want to set aside spam and blacklisted senders first, so you don't forward those messages.
If you don't want to use Webmail to manage your mail filtering, here are some alternative ways to set forwarding, all of which use SRS (Sender Rewriting Scheme), which we recommend:
- Directly via a “.forward” file:
"|/local/bin/fwd your@other.address"
- From your “.procmailrc” file:
:0
| /local/bin/fwd your@other.address
- In a manually-maintained SIEVE script:
require ["vnd.dovecot.pipe"];
pipe "fwd" ["your@other.address"];
Again from Webmail:
- After logging in, expand the “Mail” item in the top menubar, and select “Filters” from the dropdown menu.
- Click on the checkmark next to the “Forward” rule; the checkmark will turn into an “x” and the word “Disabled” will appear. It's not necessary to change the settings inside the rule; you can leave them in place in case you want to re-enable forwarding later.
Alternatively, if you've set forwarding manually in a “.forward” file, in a “.procmailrc” file, or in a manually-maintained SIEVE script, just delete the forwarding commands that you added.
From the Webmail interface, after logging in:
Expand the “Mail” item in the top menubar, and select “Filters” from the dropdown menu.
Select “New Rule” in the sidebar.
Give your rule a name in the “Rule Name:” box, e.g. “Default mailbox” or “Hiring Committee”.
If you want to deliver all of your messages (that were not caught by a previous rule) to a different folder, set up your condition as: ALL of the following, field “Size”, “Greater than”, “1”.
If you want to file only some of your messages into a different folder, then set up the condition(s) as you please; clicking on the question mark symbol next to each item will bring up information about that item.
For “Do this:”, select “Deliver to folder...”, then select the folder you want to use; the interface will allow you to create a new folder at that point if you wish.
If you want to flag matching messages as well as refile them, check the wanted flag names. It's not necessary to select any flags.
If you want to file just a copy of each message, and then keep processing it, possibly saving it again into another folder, you can uncheck the “Stop” checkbox. Note that this is rarely needed; normally you want to stop processing after filing the message.
Click on the “Save” button. This will save and activate your new rule, and return you to the Filter Rules.
If your new rule is in the wrong order with respect to the other rules, you can move it by dragging it up and down. You can disable it by clicking on the checkmark, edit it by clicking on the pages symbol, or delete it altogether by clicking on the trashcan next to the rule name.
Yes — click on the gear symbol in the top menu bar, then from the dropdown menu, select “Preferences”, then “Mail”.
Next, in the new page, under “Mailbox”, select “Mailbox Display”.
Finally, under “View or mailbox to display after login:” you can select the folder you'd like to see.
Signatures typically consist of contact details which automatically appear at the bottom of each email message you send.
To create an email signature for your ENCS account, from the Webmail interface, after logging in:
- Expand the settings item (gear symbol) in the top menu bar, and select “Preferences” then “Mail” from the dropdown menu.
- Under “General”, select “Personal Information”.
- Fill in the “Your signature” box (near the bottom of the page; scroll if necessary) with your desired signature text.
- Click on the “Save” button.
If there are other changes you want to make to your settings, such as setting your full name for the “From:” header of messages you send, you can go ahead and make them, remembering to “Save” your updates each time.
Note that you can have multiple “identities” (involving setting your full name and signature differently) for different purposes. Most people have only a “Default identity”, but if you want to create and edit others, use the identity items near the top of this page.
No, your ENCS email quota (87MB for all users) cannot be increased. When your inbox folder is full, new email messages will be bounced back to the sender, and you will not receive them. Therefore, please monitor your ENCS email regularly or forward your ENCS email to another address.
If you expect to receive a lot of mail, and have trouble keeping your inbox from becoming full, you can redirect the incoming email to another email folder — the other mail folders consume your “home and web” disk quota, which is much larger
than your “inbox” quota.
It's possible that your inbox is still over quota. You can check this using the ENCS web-based quota checking tool.
If that's the case, the reason is usually that old messages have not been permanently removed from your inbox, but rather they are just marked as ‘deleted’.
The solution to this problem is to purge your “deleted” messages (which are really only flagged as to be deleted), to really delete them. To do this, log into Webmail (requires ENCS username/password), and:
- Make sure you're in the “Mail” interface (click on “Mail” in the top menu bar if necessary).
- Go to the folder you need to purge by clicking on its name in the left sidebar; usually this is “Inbox”, at the top of the left sidebar). Messages flagged as deleted should appear in the summary with a line through them.
- Select the “Other” dropdown menu. This is the item right above “Date”, not the “Others” item in the top menubar! In the resulting dropdown menu, click on “purge deleted”.
If you are unable to purge the deleted messages using WebMail, you can try moving your inbox contents to your Unix home directory.
In the instructions below, replace “username” with your ENCS username, and “u” with the first letter of your ENCS username.
- Log in with ssh to the host “login.encs.concordia.ca”
- Move your inbox folder contents to a new folder in your Unix mail directory:
mv /var/spool/mail/u/username ~/mail/old_inbox - Refresh the display of your mail folders in your mail client. You should see a new folder named “old_inbox”.
- You can now use your mail client to move or delete messages in “old_inbox”.
- Once you've recovered all useful messages from “old_inbox” and moved them to other folders, you can delete that folder.
In the instructions below, replace “username” with your ENCS username, and “u” with the first letter of your ENCS username.
Recover deleted email in Inbox folder
- Before you start, close all of your email clients.
- Log in with ssh to login.encs.concordia.ca.
- Go to the snapshot directory inside the parent directory of your mail folder:
cd /var/spool/mail/u/.snapshot
Note: you will have to type the path in full: the word “.snapshot” will not be auto-completed by pressing the tab key. - Show your inbox in all of the snapshots, listed in chronological order:
ls -altr */username and select the snapshot that is closest to (but before) the delete time (e.g. “hourly.0”). - Copy the selected file to your “mail” directory, for example: cp hourly.0/username ~/mail/recovered
- Now you can restart your mail client, and refresh the display of your mail folders.
- You will see a new mail folder named “recovered” via WebMail or any other email client. Look there for the missing messages, and move them to a more appropriate folder.
- When you're done, you can safely delete what's left in the “recovered” folder, since it is duplicated in your regular inbox.
Recover deleted email in folders other than Inbox
Under Windows, your mail folders (other than “inbox”) are on your “U” drive (Unix home directory), in a folder called “mail”.
To recover mail in a “non-inbox” folder (for example: “Sent”), right click on the “mail” folder in the “U” drive and browse the snapshots for older versions of that folder. Under Unix, those same snapshots are available in the directory “/home/u/username/mail/.snapshots/”.
Note: “.snapshots” will not autocomplete, so you must type it explicitly.
In both cases, once you've found a satisfactory snapshotted version of your damaged folder, copy it to the “mail” folder under some other name (such as “recovered”), then refresh your mail client. Look in the “recovered” folder for the messages you wish to undelete, and move them to an appropriate folder.
When you're done, delete the “recovered” folder, since the rest of its contents are duplicates of the undamaged part of your original folder.
Large attachments can cause problems for email servers, especially when sent to a large number of recipients. Mailing lists, for example, often reject very large email messages. To send a large file via email, you must upload the attachment to the ENCS File Sharing Service and send the link via email. The email recipient will simply have to click on that link to download the attachment.
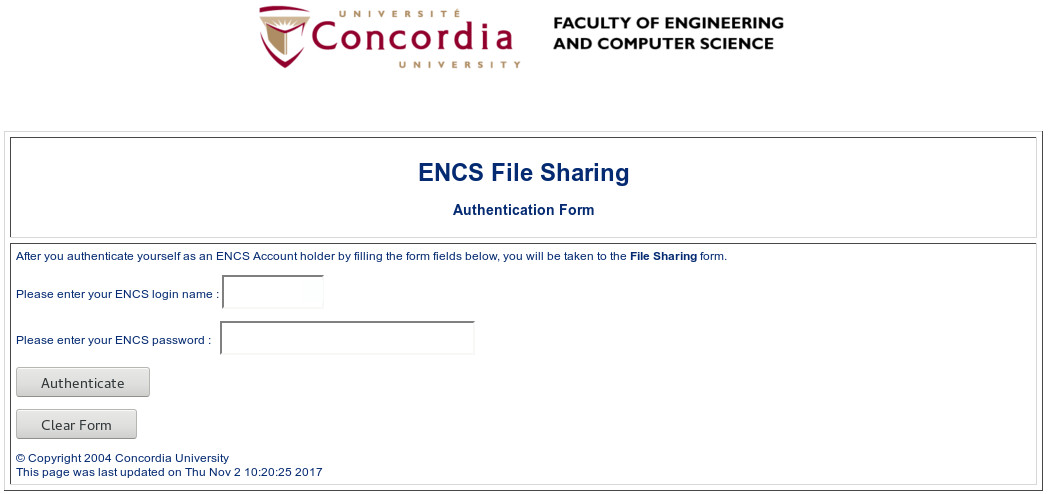
How to access the ENCS File Sharing Service:
- Visit https://fis.encs.concordia.ca/share
- Log in to the service with your ENCS username and password.
- Click on “Browse“ and select the file to upload.
- The name of the selected file appears next to the “Browse” button.
- Click on “Upload” to upload the file and create the shareable link.
- A link to the uploaded file will appear on the screen.
- An email containing the link will be sent to your ENCS email address.
- Send the link to the document via email.
Example:
- Visit https://fis.encs.concordia.ca/share
- Log into the service with your ENCS username and password.
- Click “Browse” and select the file to upload.
The name of the selected file should appear next to the “Browse” button.

- Click on “Upload” to upload the file and create the shareable link.
A link to the uploaded file will appear on the screen.
An email containing the link will be sent to your ENCS email address.
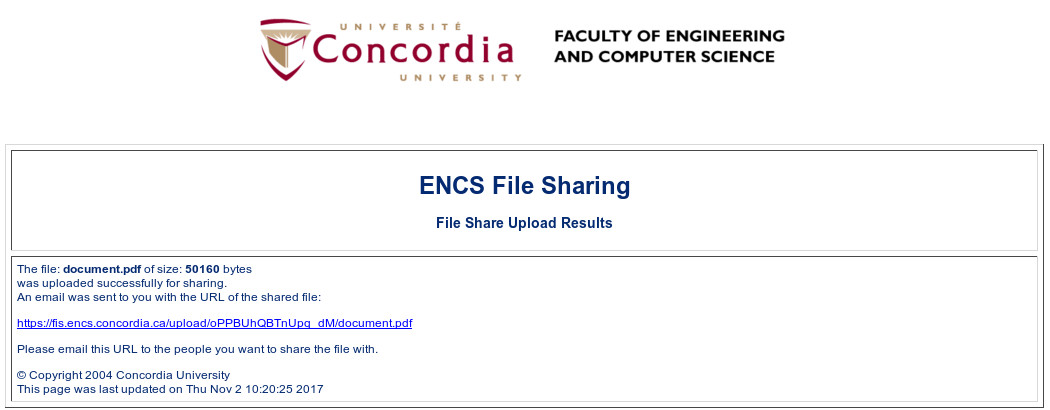
- Send the link to the document via email.
One of the ways to back up your ENCS email to an external device is to use an email client, like Mozilla Thunderbird.
- Configure an email client (Mozilla Thunderbird) on your personal machine.
- Create a local folder:
- Right click your account name in the left hand side bar within Thunderbird
- Select “New Folder”
- Enter a name for the folder and choose its parent folder from the drop down list
- Click on “Create Folder”.
- Right click on the local folder you created and click on “Properties”
- Verify that the folder’s Location is on your computer
- Copy (or drag and drop) the emails you wish to back up from your inbox to the local folder you just created.
Another method is to back up your ENCS Inbox to your home computer.
In this example, “username” represents AN ENCS username and “u” is its first letter.
- Log in to login.encs.concordia.ca.
username’s ENCS Inbox is located at /var/spool/mail/u/username - Create a folder to store your back up file, for example /home/u/username/Inbox_backup.
- [grace] [/home/u/username] > mkdir Inbox_backup
- [grace] [/home/u/username] > cp /var/spool/mail/u/username Inbox_backup
- The above commands created a file named username in the Inbox_backup directory.
If you would like to use Mozilla Thunderbird to access the contents of your email backup, e.g., /home/u/username/Inbox_backup/username
Copy the username file and place it in the system’s Mozilla Thunderbird Local Folders.
Right click on the Local Folders in the left hand sidebar and select “Settings” to determine the location of the local directory.Launch Thunderbird.
A folder named Inbox_backup should appear in Local Folders containing all of your backup Inbox email.
If you would like to back up email folders other than your inbox, (i.e., Sent, Trash...), those folders are located in /home/u/username/mail/.
- Webmail: select the “plus” symbol at the top right of the message pane, and from the resulting dropdown menu, click on “View Source”.
- Mozilla/Netscape/Thunderbird: “View”, “Page Source”
- Pine: Press “h” to toggle full headers
- Most other clients: https://mxtoolbox.com/Public/Content/EmailHeaders/
While logged into Webmail (requires ENCS username/password), and inside the “mail” interface (select “Mail” in the top menubar if necessary):
- From the left sidebar select “Folder Actions”, and from the resulting dropdown menu, select “Show All Mailboxes”.
- If you have sub-mailboxes, you might have to also (again from “Folder Actions”) select “Expand All”.
- If you still don't see your folder, try (again from “Folder Actions”) selecting “Rebuild Folder List”.
- Subscribed folders (which are shown to you by default) are in normal font, while non-subscribed mailboxes (normally not shown to you) appear in italics.
- Assuming that your “lost” folder was simply not subscribed, to subscribe to it, right-click on its name, and from the dropdown menu, select “Subscribe”. You can also set it to check for new mail, if you plan to receive new mail in that folder.
- You can now (from “Folder Actions”) “Hide Unsubscribed” if you like.
Under some circumstances, very large mailboxes are incorrectly shown as empty when first accessed (“There are no messages in this mailbox”). This happens because some ways to sort a mailbox are very slow.
As a quick workaround, switch to another folder, then switch back. That generally clears it up for your current Webmail session.
To stop the problem permanently, you need to change to another sorting method. While logged into Webmail:
- Expand the settings item (gear symbol) in the top menu bar, and select “Preferences” then “Mail” from the dropdown menu.
- Under “Mailbox”, select “Mailbox Display”.
- Either set “Default sorting direction” to “Ascending”, or, set “Default sorting criteria” to anything other than “NONE”.
If you like to see newer messages first, “Date / Descending” is a good choice.
Group account FAQ
A request for a group account can be made only by a full-time employee.
To request a group account, the employee must contact the Service Desk and provide the following information:
- The purpose of the group/account
- All ENCS usernames (or Concordia ID number) requiring access to the account
1. Shared file space for group members
Unlike your personal ENCS account, the group account normally cannot be used for interactive logins on an ENCS machine. Instead, you can access the group directory once you log in with your usual ENCS username and password (assuming, of course, that you are a member of the group).
To find out who is in a group, you can use this command in a Unix/Linux shell:
getent group groupname
Normally, only the group's members have permission to create, modify, and delete files in their group directory; individual files and subdirectories can have different permissions set on them if desired.
2. Email alias which delivers messages to all group members
For most groups, an email alias (in the form 'groupname@encs.concordia.ca') is created along with the group account. Any email sent to this alias will be re-distributed to all group members.
3. Group web page
For non-administrative groups, a group web directory is also created. The material you place in your group web directory will appear at the URL:
https://users.encs.concordia.ca/~groupname
Examples in this section are given for the group “foo”. Adjust them as necessary for your group name.
For Windows users
To access the group's home (private) directory:
- On an AITS-managed desktop, go to drive S:
- Double click on ‘f’ and then click on ‘foo’.
- On a user-managed machine, you may need to map the group network share manually before you can use it.
The mount path for the share is:
\\filer-groups.encs.concordia.ca\v_groups\groups_unix\f\foo
To access the group's web directory:
The group's web directory might not be mounted automatically on Windows. In that case, you will need to mount it manually.
The mount path is:
\\filer-groups.encs.concordia.ca\v_groups\groups_web\f\foo
To verify directory group ownership and permissions:
To check the permissions on a directory, you must verify that the ‘setgid’ bit is ON for the group directory. To do so, follow these instructions:
- Right click on the directory (in this example ‘sd’)
- Click on Properties
- Select the Secure Share tab
- Make sure that the status of SGID is checked ON.
To check the group ownership of a file, follow these instructions:
- Right click on that file in your group directory
- Click on Properties
- Select the Secure Share tab
- For private (to your group) files, the permissions should be set as shown below. For files in the web space, make sure that you also turn on the “R” and “X” permissions under ‘Other’.
For Unix/Linux users
To access the group's home (private) directory:
You can access the group's home directory with:
cd /groups/f/foo/
To access the group's web directory:
To make files available on the web page of your group account, place them in:
/www/groups/f/foo/
Checking and setting permissions:
To check the “setgid” bit on a directory:
ls -ld 'the_group_directory_name'
If you don't see a "s" in the permissions field, you'll need to set it.
To set the "setgid" bit on all directories in a group directory:
find 'your_group_directory' -type d -exec chmod g+s {} \;
To ensure that all files in a group directory can be read and written to by members of a group:
chmod -R g+rwX 'your_group_directory'
CVS and SVN repositories can be generated using your ENCS account. However, it means that only you have permission to access this repository. It makes more sense to create a CVS/SVN repository with a group account as it will benefit all group members in controlling the source version.
Please make sure:
- the umask is set; so that group writing is enabled and the root of the repository is writeable by the group.
- the sticky s bit is turned on. This will cause any subdirectories and files that are created to belong to the correct group.
CVS
To create repository
This action needs only to be done once. Go to the group location, create a repository, and set the sticky s bit for this folder.
Assuming the group location is /group/s/sd, the CVS repository to create would be called CVS_REPOSITORY.
[genie] [/home/n/nguyen] > ssh login
[grace] [/home/n/nguyen] > cd /groups/s/sd
[grace] [/groups/s/sd] > mkdir /groups/s/sd/CVS_REPOSITORY
[grace] [/groups/s/sd] > chmod 2770 CVS_REPOSITORY/
[grace] [/groups/s/sd] > cvs -d /groups/s/sd/CVS_REPOSITORY init
To import
If you want to import a project source folder named my_cvs_project to the CVS repository, go to that source folder and start to import.
[grace] [/home/n/nguyen] > cd /home/n/nguyen/my_cvs_project
[grace] [/home/n/nguyen/test] > cvs -d /groups/s/sd/CVS_REPOSITORY import -m "Initial import project test" my_cvs_project INITIAL start
To check out
If your group members want to check out my_cvs_project to your their ENCS accounts located at $HOME/workspace
[genie] [/home/n/nguyen] > cd ~/workspace
[genie] [/home/n/nguyen/workspace] > cvs -d /groups/s/sd/CVS_REPOSITORY/ co my_cvs_project
SVN
To create repository
This action needs only to be done once. Go to the group location, create a repository, and set the sticky s bit for this folder.
If the group location is /group/s/sd, the SVN repository I want to create called SVN_REPOSITORY
[genie] [/home/n/nguyen] > ssh login
[grace] [/home/n/nguyen] > cd /groups/s/sd
[grace] [/groups/s/sd] > mkdir /groups/s/sd/SVN_REPOSITORY
[grace] [/groups/s/sd] > chmod 2770 SVN_REPOSITORY
[grace] [/groups/s/sd] > svnadmin create --fs-type fsfs SVN_REPOSITORY/myproject/
To import
If you want to import a project source folder named my_svn_project to the SVN repository.
[grace] [/home/n/nguyen] > svn import /home/n/nguyen/my_svn_project/ file:///groups/s/sd/SVN_REPOSITORY/myproject/trunk -m 'Initial import'
To check out
If your group members want to check out my_svn_project to your their ENCS accounts located at $HOME/workspace
[grace] [/home/n/nguyen] > cd ~/workspace
[grace] [/home/n/nguyen/workspace] > svn checkout file:///groups/s/sd/SVN_REPOSITORY/myproject
Web page FAQ
To set up your ENCS website, follow these steps, replacing “username” and “groupname” with your actual username and your actual group name and replacing “u” and “g” with the first letter of your actual username or group name.
- Locate your web directory.
If you're using an ENCS-managed desktop or server, then your personal web directory, and any group dirctories you might have, are already mapped or mounted. Under Windows, they are drive “W” (personal web directory) or drive “X” (all of the group directories: follow “g\groupname” to the one you want). Under Unix, go to “/www/home/u/username” or “/www/groups/g/groupname”.
If you're using a user-managed host, you must manually map or mount the directories of interest, using the paths:
- Personal web directory: \\filer-users\web\u\username
- Group web directory: \\filer-groups\v_groups\groups_web\g\groupname
- Create your home page.
Create a file "index.html" in your web directory, using the text or HTML editor of your choice. Your new file will count against your "basic home and web" disk quota.
If you want to have multiple pages on your website, create additional files as needed.
- Provide access to the world.
Verify web directory permission.
For personal web home directory:
Your web directory must normally be accessible to "the world" (all users on the system). It will have been created with the correct permissions, that is, "drwxr-xr-x" as seen under Unix.
If that's not the case, you can fix it with:
chmod 0755 /www/home/u/username
Alternatively, if it's important that other users not be able to reach your web files through the filesystem, it's possible to set up the ownership and permissions like those for group directories (see below). This is something that requires staff intervention: if you need that change, contact the Service Desk.
For group web home directory:
Group web directories are owned by the special web user, and have permissions "dr-xrws---" as seen under Unix. You cannot change them.
Verify web file permission.
In order for your web pages to be visible on the web, the special web user must be able to see them, so in practice, you must make the corresponding files world readable. If you have subdirectories under your web directory, they must be world readable and world executable.
From Linux/Unix:
You can assign world read permission on a file with (e.g.):
chmod o+r /www/home/u/username/index.html
chmod o+r /www/home/g/groupname/index.html
You can assign world read and execute permissions on a directory with (e.g.):
chmod o+rx /www/home/u/username/subdirname/
chmod o+rx /www/home/g/groupname/subdirname/
You must ensure correct permissions on all of your web files and directories.
From Windows:
In your personal web directory, it is likely that your files already have world read permission, inherited from the parent directory when the file was created. If this isn't the case, you'll need to log into a Unix host to fix the permissions as described above.
In group directories, newly created files probably have the wrong permissions. To fix them, follow the method above, but check also that the owner has “Write” permission.
- View your web page.
To view your personal or group web pages, go to any web browser and type the following web address:
Personal web URL:
https://users.encs.concordia.ca/~username/
Group web URL:
https://users.encs.concordia.ca/~groupname/
1. Prepare your website and web directory
2. Create a .htaccess file
This file should be in the same web directory that you want to protect.
Log in from one of ENCS Linux desktops or ssh to one of ENCS Unix servers, then use your preferred text editor from the Linux/Unix command console to create a file (example: pico .htaccess). In this file, type in the following lines:
- AuthType Basic
AuthName "Restricted Files"
AuthUserFile /www/home/u/username/ProtectedWebDir/.htpasswd
Require user SOMEUSER
Where u is the first letter of your own username; note that if the web pages you are protecting are in a group directory, then the "AuthUserFile" will be "/www/groups/g/groupname/ProtectedWebDir/.htpasswd" instead, once again replacing g and groupname as appropriate. someuser is the username that you are allowing to visit your protected web site, and
for which you'll create a password entry below. For example if you were user jsmith with web documents in the directory '/www/home/j/jsmith/protected/', and you wanted to restrict access to the required name testuser, your .htaccess file might look like:
- AuthType Basic
AuthName "Restricted Files"
AuthUserFile /www/home/j/jsmith/protected/.htpasswd
Require user testuser
3. Create a .htpasswd file
You can create this file in the same directory as .htaccess by typing in the information below:
- htpasswd -c .htpasswd someuser
In the example above, the username is testuser so you would type:
- htpasswd -c .htpasswd testuser
You will be prompted to enter the password you would like to use. The .htpasswd file will be created in the current directory and will contain an encrypted version of the password.
NOTE: To add a new user or modify an existing user, type: htpasswd .htpasswd anotheruser
4. Provide proper permissions to the two files
You have to give proper permissions (world readability) to .htaccess and .htpasswd files.
Type the following command:
- chmod a+r .htaccess
chmod a+r .htpasswd
5. Protect your web directory from access through the file system
Now that you've protected your web directory from unauthorized access, you'll probably also want to protect its contents from being accessed by ENCS users through the file system.
You'll need help to do this: open a ticket with the Service Desk and ask to make the directory owned by the web user, and not world-readable. The system administrators will make the required changes for you.
Be aware that the contents of the directory will still need to be world-readable in order to be served by the web server. If you use Windows to create new files after the directory ownership and permissions are changed, you'll also need to explicitly change permissions on newly created files to (a) add permission for the owner to write to the file, and (b) add permission for others to read the file.
6. View Protected Web Pages
To view your protected web pages, go to any web browser and type the following Web address:
- http://users.encs.concordia.ca/~username/ProtectWebDir/
Example: If you were user jsmith and your protected web directory is “/www/home/j/jsmith/protected/”, you have to type:
- http://users.encs.concordia.ca/~jsmith/projected/
7. Unprotect this Web Directory
To unprotect this web directory area, just delete the .htaccess and the .htpasswd files.
You can run CGI scripts on your personal and group ENCS web space.
You can place your .cgi file anywhere on your web space, but take careful note of the following points:
- The first line in your CGI script file should be:
#!/encs/bin/perl
- Make sure the directory containing your CGI script has permissions such that:
- web users can have access to the scripts inside (world executable)
- any newly created files in the directory are group owned (group sticky bit)
For any directory containing your scripts, change the permissions as follows:
chmod 2771 <directory>
- Make sure your CGI script files also have the proper permissions:
chmod 755 <filename>
User account FAQ
To obtain access to your ENCS account, you must be associated with the Faculty of Engineering and Computer Science as a student, staff member, faculty member, or other authorized personnel.
If you meet any of these requirements, submit an IT Service Desk Support Request or email help@concordia.ca.
To change your password, visit the password reset page (requires ENCS username/password).
If you have forgotten your password and require in-person support, visit one of the following support locations:
- Room H-964, on the 9th floor of the Hall building
- Room EV-7.182, on the 7th floor of the EV building
For security reasons, passwords cannot be reset by email or phone.
In an effort to keep accounts consistent, the Concordia netname is typically used as the basis for the ENCS username (though the passwords are different).
ENCS usernames will not be modified unless there is a valid reason (for example, the username is an offensive word in the user's native language). To request a change, you must contact the Service Desk to ensure that both your netname and ENCS user account can be changed.
No — you are responsible for the security of your ENCS account. Account sharing is strictly prohibited.
Student access to ENCS accounts is based on registration in ENCS degree programs or courses that are supported with ENCS computing resources.
ENCS student accounts are granted a grace period before they are scheduled for deletion, as follows:
- Students in a degree program: 4 months after completion of the program.
- Students taking ENCS courses: 1 month after completion of the course.
Once a student is no longer eligible for service (is no longer registered in an ENCS program or supported course), and after the grace period has passed, then their account is placed into an “expiry sequence”. Over a period of a few weeks, the student is sent several email messages warning them of the upcoming account deletion, then access to the account is restricted, and finally, the account is deleted. Students are advised to retrieve any files or email messages that they wish to keep, as well as to notify their email correspondents that their ENCS email address will be deactivated.
If a student needs to continue using their computer account for longer than the usual grace period after graduation, (example: they are still collaborating with a professor) the student's supervisor must contact the Department Administrator (DA). If the department approves, the DA updates or creates the record for the student in the Engineering Identity Information System (EIIS). This makes it possible for the computer account to remain active.