Virtual Office Hours
When doing virtual office hours, there are two ways to proceed:
- Office hours that occur at the same time each week
- Office hours that are scheduled at different times during the week
Virtual office hours that occur at the same time each week
In this scenario, teachers can set up one recurring Zoom meeting with no fixed time and the waiting room enabled. To do this:
1) Log into Moodle and navigate to your Zoom plug-in. Information regarding how to add the Zoom plug-in to your Moodle course can be found under the heading “Scheduling virtual course meeting through Moodle”.
2) Click Schedule a New Meeting.

3) Complete the form as shown here and click Save.

4) Your office hours will appear at the top of your scheduled meetings. You will start the meeting at the scheduled time. Students will click to join the meeting. They will automatically be put into the waiting room. You will control when to invite the student from the waiting room into the meeting.


Virtual office hours that are scheduled at different times during the week
In this scenario, you will not have fixed office hours. Instead, students will schedule virtual meetings with you on an as-needed basis. To do this, you will use the Moodle Scheduler plug-in. You will indicate blocks of time when you are available, and students will book a particular time slot.
1) Log into Moodle and navigate to your Zoom plug-in. Information regarding how to add the Zoom plug-in to your Moodle course can be found under the heading “Scheduling virtual course meeting through Moodle”.
2) Click Schedule a New Meeting.

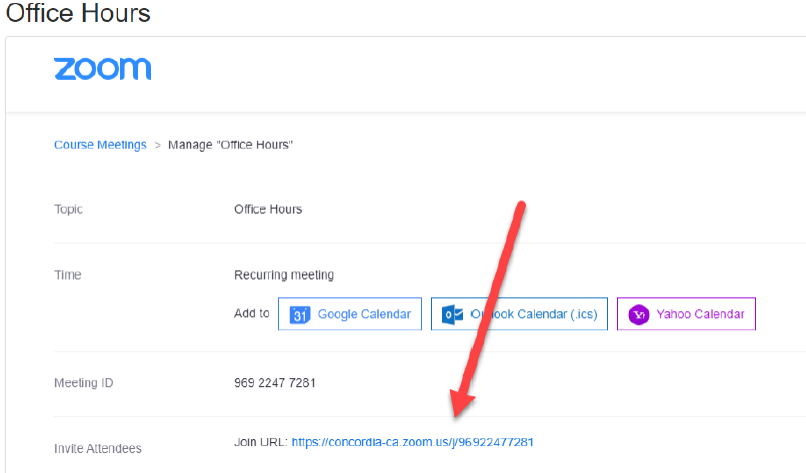
3) Type “Office Hours” into the Topic field without indicating a specific time.

2) Copy and save the URL generated by completing the previous step. You will need it later.
3) Navigate to the main page of your Moodle course and Turn editing on.

4) In the top section of the course, click Add an activity or resource.

5) Click Scheduler

6) Complete the form as shown here and click Save and display.

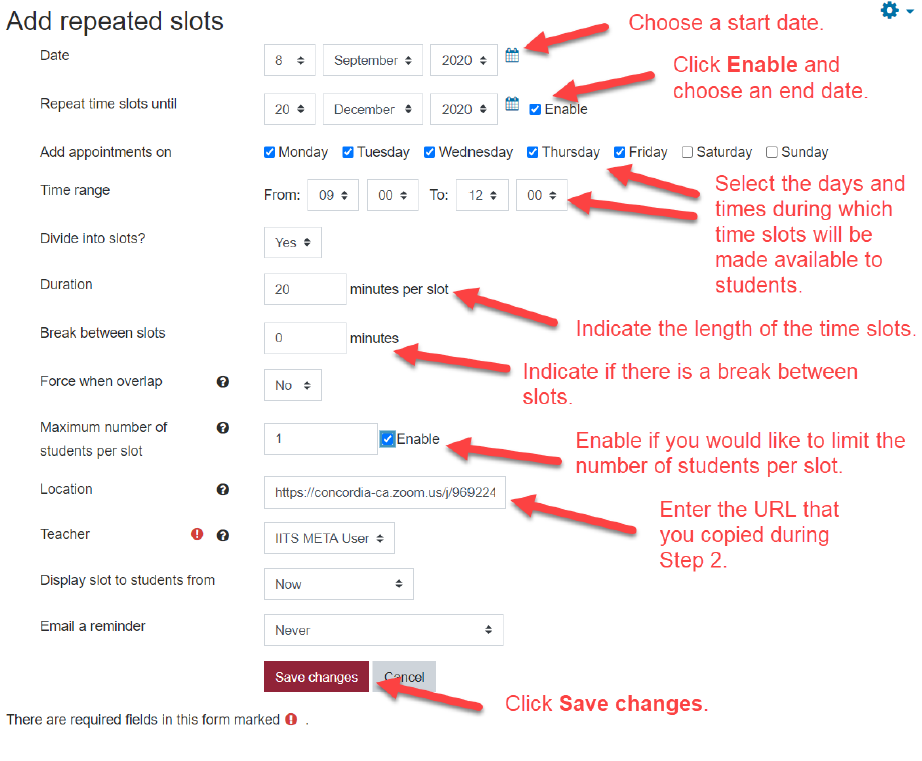
7) Click Add slots, and then Add repeated slots.

8) Complete the form as shown and click Save changes.
9) The available time slots will be generated…

…and the Scheduler will appear on your Moodle course page.

10) When a student clicks on the link, they will be able to reserve a time slot by clicking Book slot. They will also see the meeting Location.

11) As the instructor, you can see if someone has booked a time slot when you click on the Scheduler. You will also receive an email notification if you selected that option in Step 6.
