How to create a request for Leave of Absence
Graduate students
Important
Before you start or if you are experiencing any issues accessing your Student Centre:
- Make sure your browser is up-to-date with the latest version available.
- If you are using pop-up blocker, please ensure it is turned off.
- If you are still experiencing issues, try using a different browser.
Navigate to the Service Requests menu
| 1 | Log into the Student hub with your Netname and Password. |
| 2 |
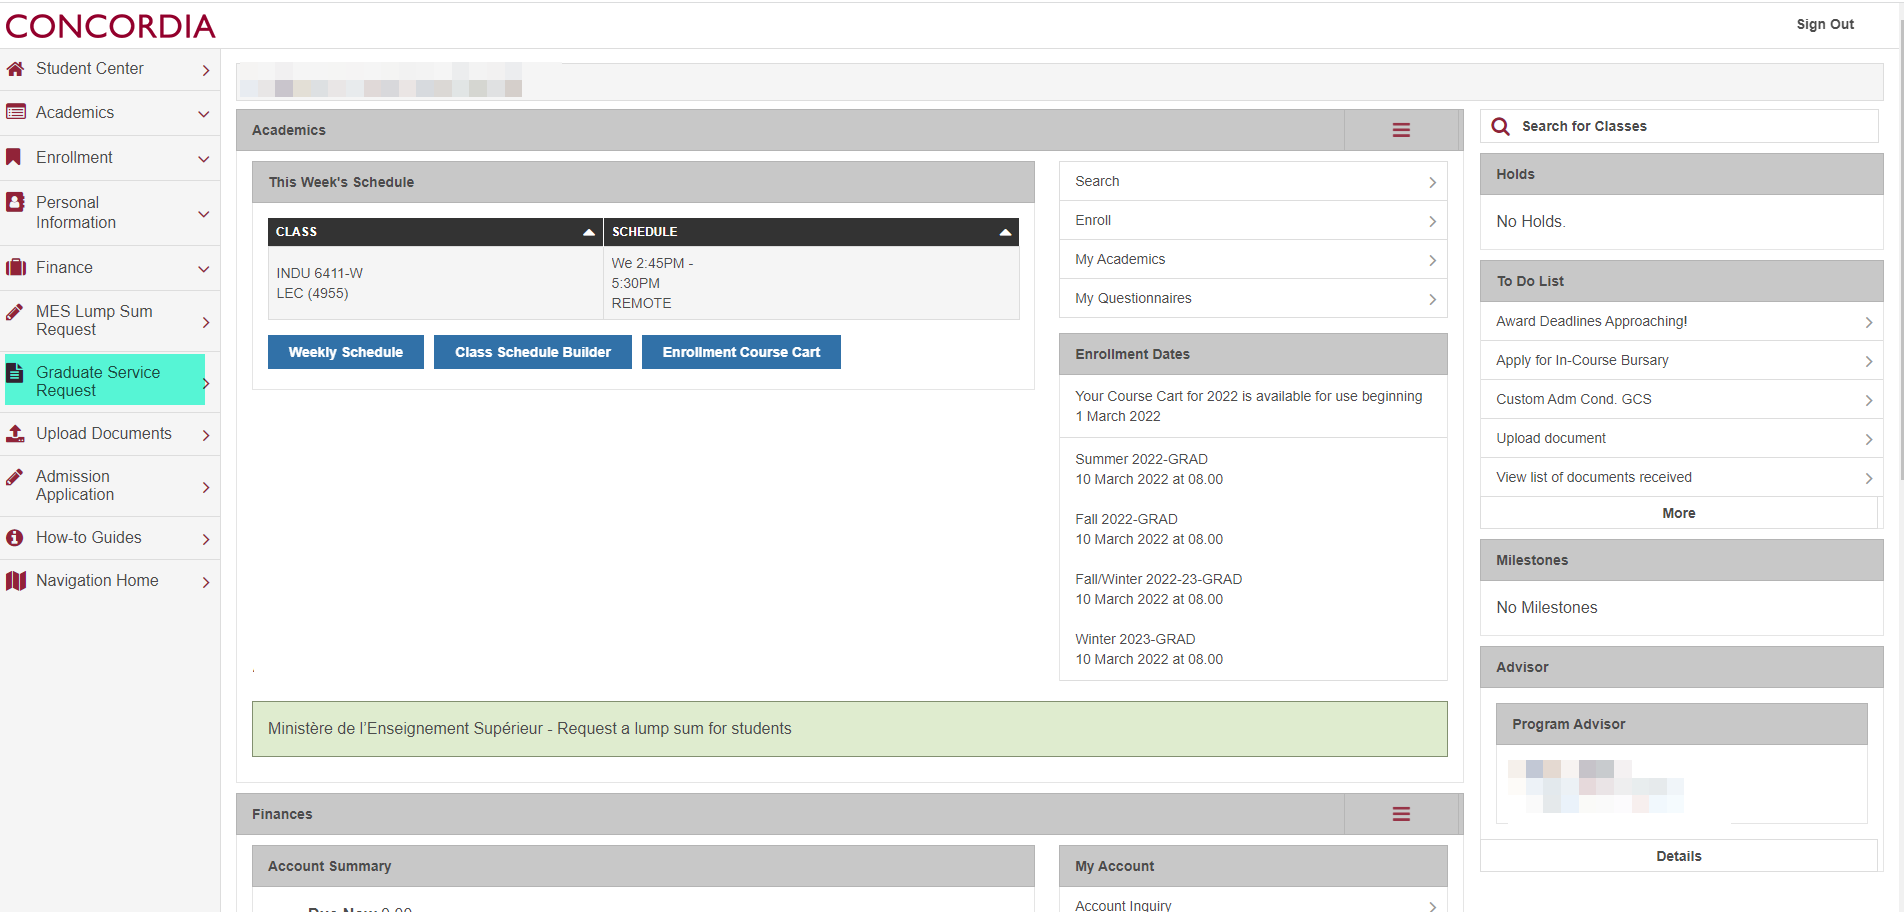
Click on MY CU ACCOUNT to access your Student Centre. |
| 3 |
Click on Graduate Service Request in the upper left-hand side of the screen. |

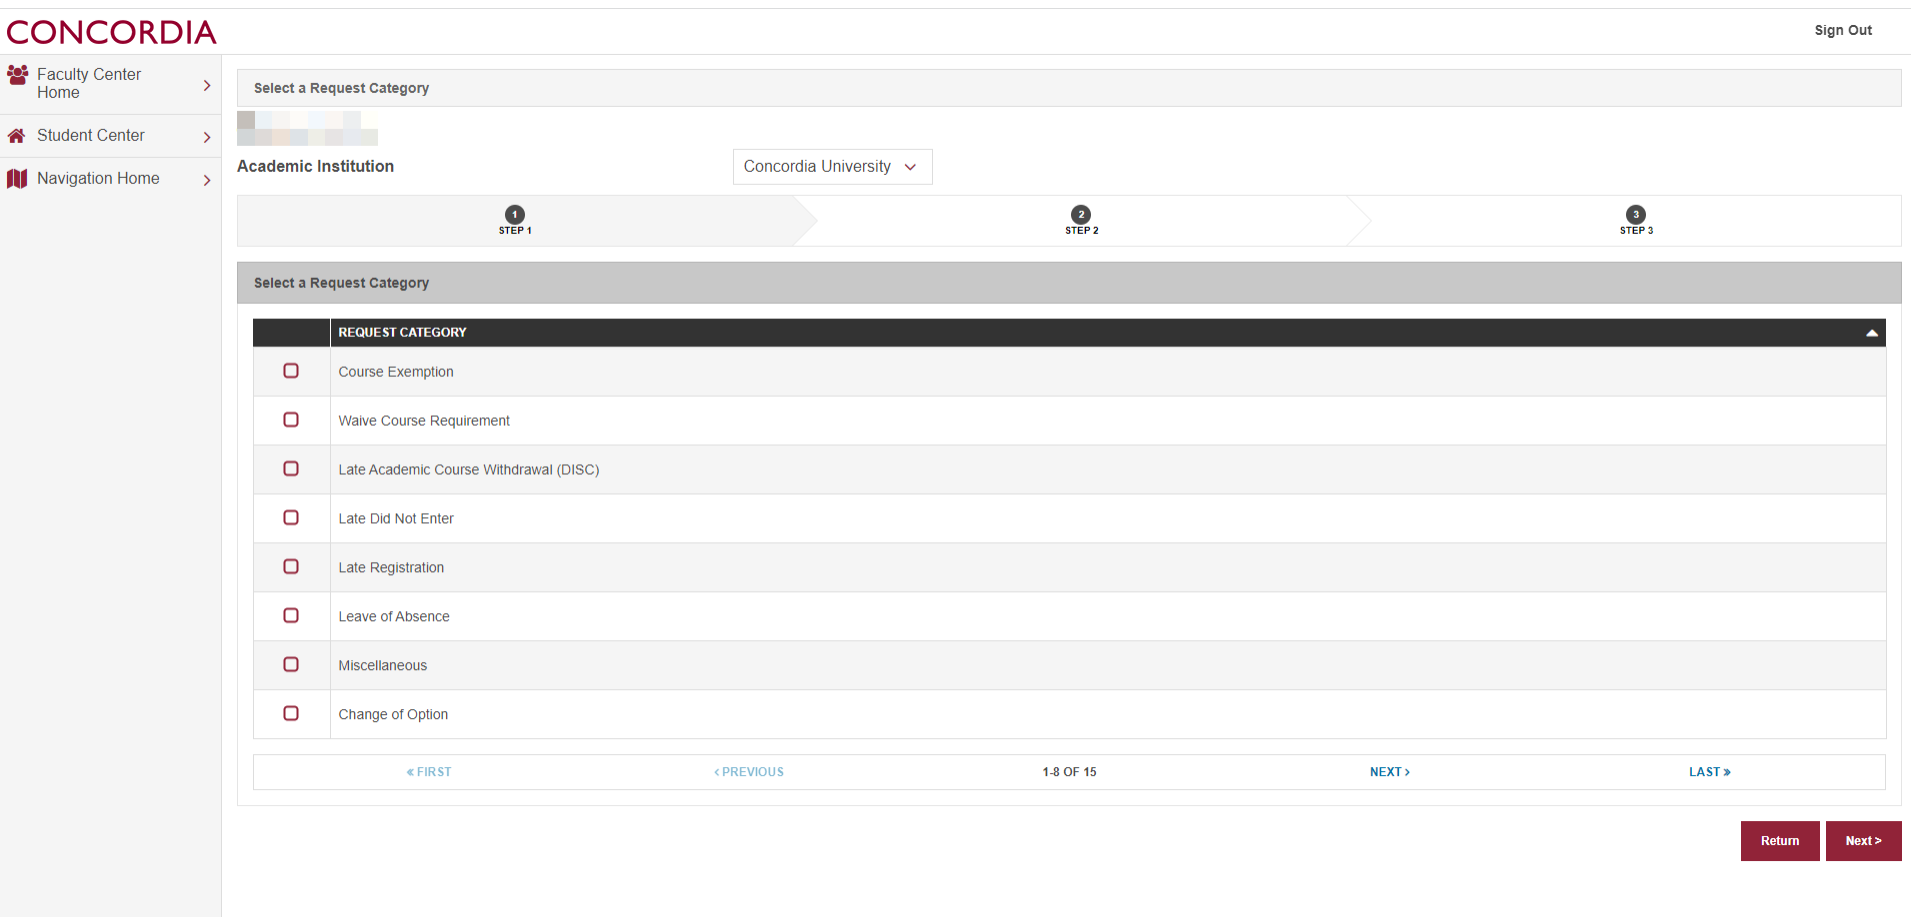
| 4 | On the My Service Requests screen, you will be able to see all of your Student Requests, even those submitted by your department. Select the Create New Request button. |
| 5 | Under Select a Request Category, click on Leave of Absence and then click Next. NOTE: If you are unsure which option to select, check with your department. Selecting the wrong request category may result in a delay. |

Create a new Service Request
| 6 | Select one of the three options: 1) with Access – permits the student access to university services (eg. library). There is a fee associated with this type of leave. This is granted in exceptional circumstances. 2) Parental – the student has access to university services. There is no fee for this type of leave. It's applicable for maternity or paternity leave and a proof of birth or doctor’s note is required. 3) without Access – the student has no access to the university services. Students with health care should consult their provider to ensure they remain covered. |
| 7 | Select the Graduate Program Assistant for your program for this request, then click Next. NOTE: If you cannot find your GPA, ensure you are viewing all the options, by selecting View All. If you are still unsure as to who you should select, check with your department/SGS. Sending a Student Request to the incorrect person may result in a delay. |
| 8 | Select your academic program and academic plan by clicking on the search icon next to Academic Program and Academic Plan. |
| 9 | A menu will pop-up from which you can select your program. If you have more than one Academic Program, select the one that corresponds to this request. |
| 10 | Do the same for choosing the Academic Plan. If you have more than one Academic Plan, select the one that corresponds to this request. |
| 11 | Choose the Type of Leave, Start of Leave and End of Leave by clicking on the search icon for each section. |
| 12 | From the pop-up window, choose the Type of Leave. Refer to the Graduate Calendar on the different types of leaves. |
| 13 | From the pop-up window choose the Start of Leave. |
| 14 | From the pop-up window choose the End of Leave. |
| 15 | A comment/explanation must be added as well as an attached file (if applicable) to support your request under Comment and File Attachments. Note: Any leave that is requested after the DNE deadline of the term is considered exceptional circumstances and requires supporting documentation. |
| 16 | The request can be seen under My Service Requests as a proof of submission. When a decision is made, it will be visible. NOTE: You can check the status of all your Student Requests at any time by navigating to this page. |

