How to report an exam conflict (Mobile)
This is a guide to reporting an exam conflict using the Student Centre.
Important
Before you start or if you are experiencing any issues accessing your Student Centre:
- Make sure your browser is up-to-date with the latest version available.
- If you are using pop-up blocker, please ensure it is turned off.
- If you are still experiencing issues, try using a different browser.
How to access your Student Centre
Log in to the Student Hub, select My CU Account, then the Student Centre.
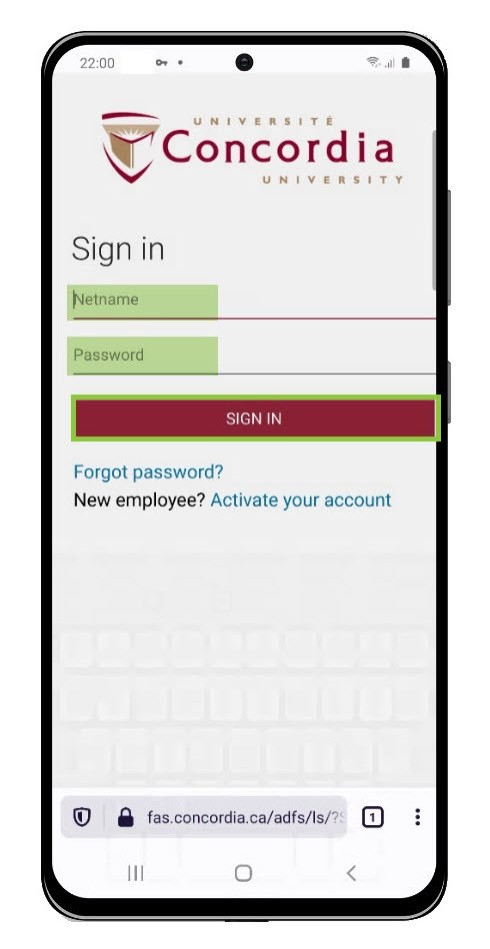
Sign in with your Netname and password.
Your exam schedule
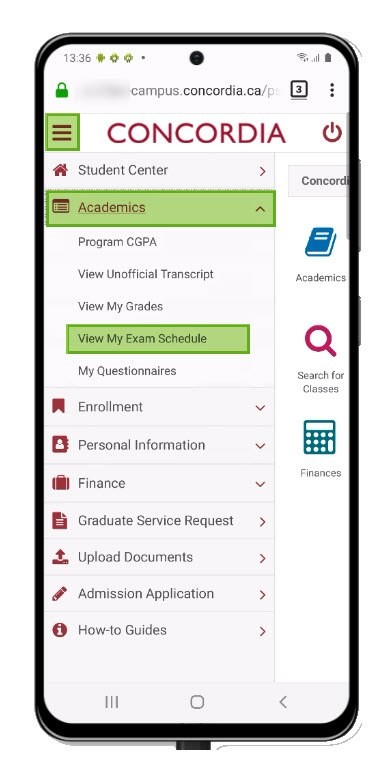
Select the Menu icon on the upper left-hand side of the screen.
Select Academics.
Select View My Exam Schedule.
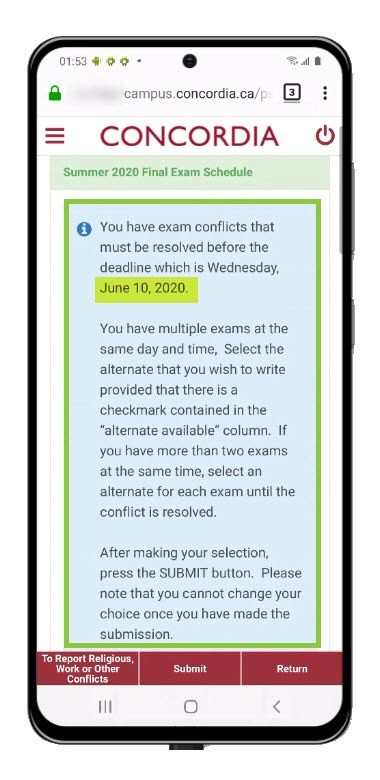
IMPORTANT:
Find the deadlines to report an exam conflict and other important info in the Information section.
View the Final Exam Schedule page to check for time conflicts.
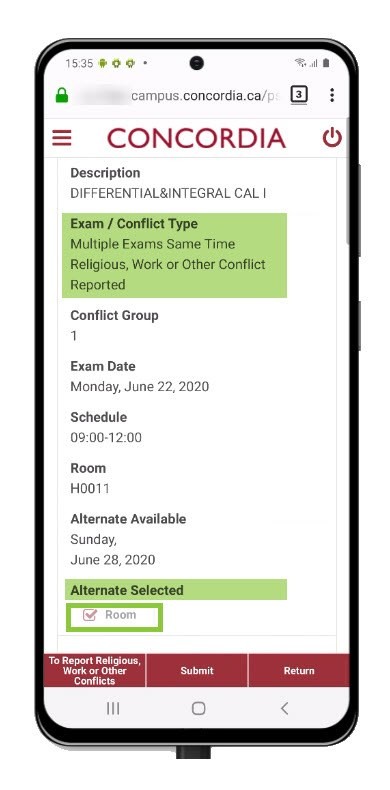
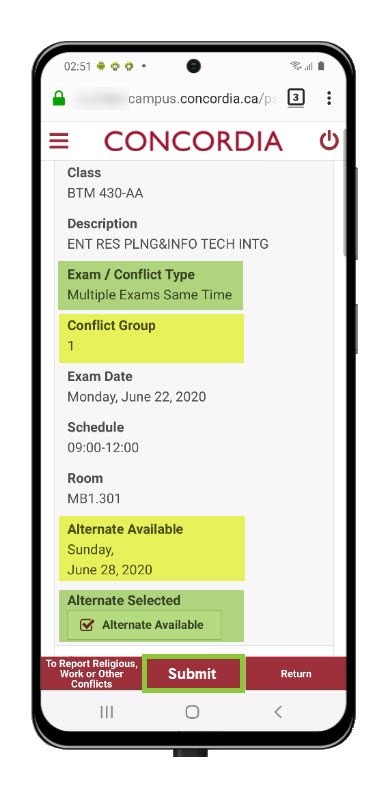
The Exam/Conflict Type section shows any exams scheduled at the same time.
The Conflict Group section indicates the classes with an exam conflict.
Choose the Alternate Selected box to pick an alternative date (if available).
Select Submit.
NOTE: The Alternate Selected box is clickable only when an exam conflict exists.
Report religious, work or other conflicts
You can report an exam conflict if you are unable to attend an exam on the scheduled date due to a valid religious or work-related reason, or other such conflict.
Select To Report Religious, Work or Other Conflicts.
NOTE: You may select an alternative exam date solely in the case of a valid conflict. You will be required to submit documentation.
If you have a religious conflict with an exam time for a course that has no alternative date, contact the Examination Office at examsoffice@concordia.ca.
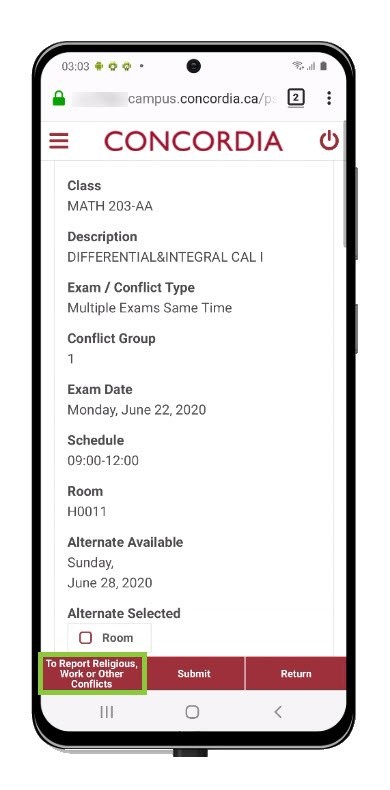
Scroll to view the classes with an exam conflict.
Navigate using the arrows to view the Conflict Type column.
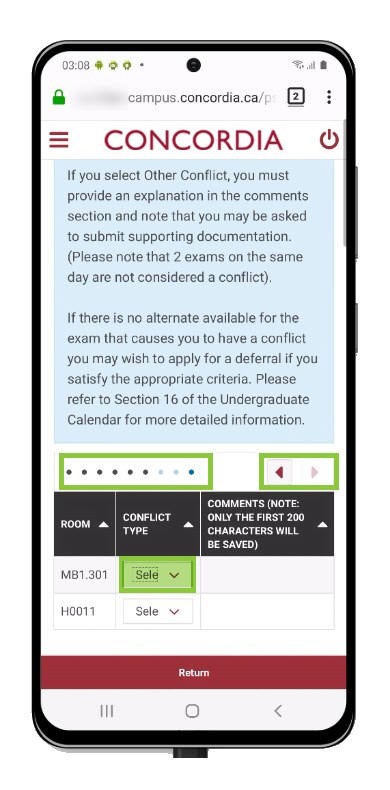
Select the conflict type.
If you select Other or Religious, the Comments field will be active. Add information to support your request in the Comments field.
If you select Work, the Comments column will remain inactive.
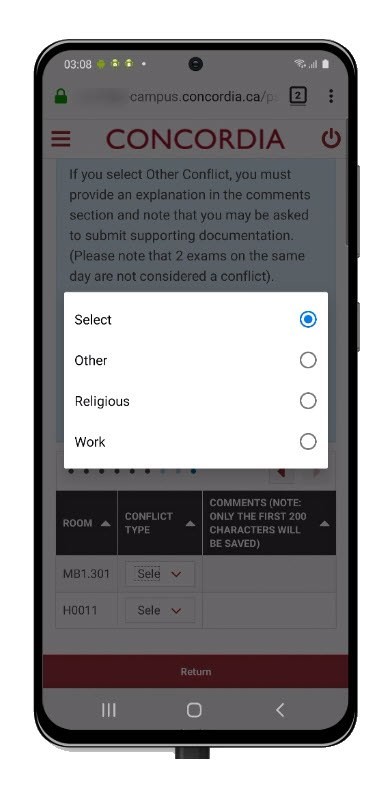
Once you've made your selection, click Submit.
NOTE: Read the information in the box at the top of your exam schedule. It provides details on the supporting documents you will need to provide.
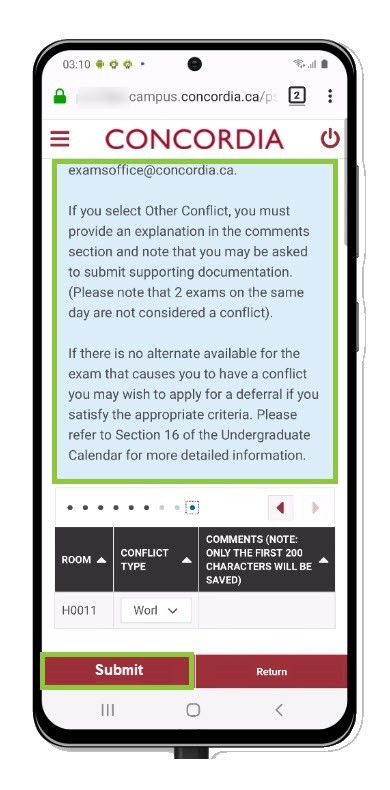
Selecting Submit returns you to the My Exam Schedule page, where the Alternate Selected checkbox is automatically selected.
This means you have successfully changed your exam to the alternative time shown.
