Read every step carefully. If you fail to follow this instructions the projector could fall and cause serious injuries.
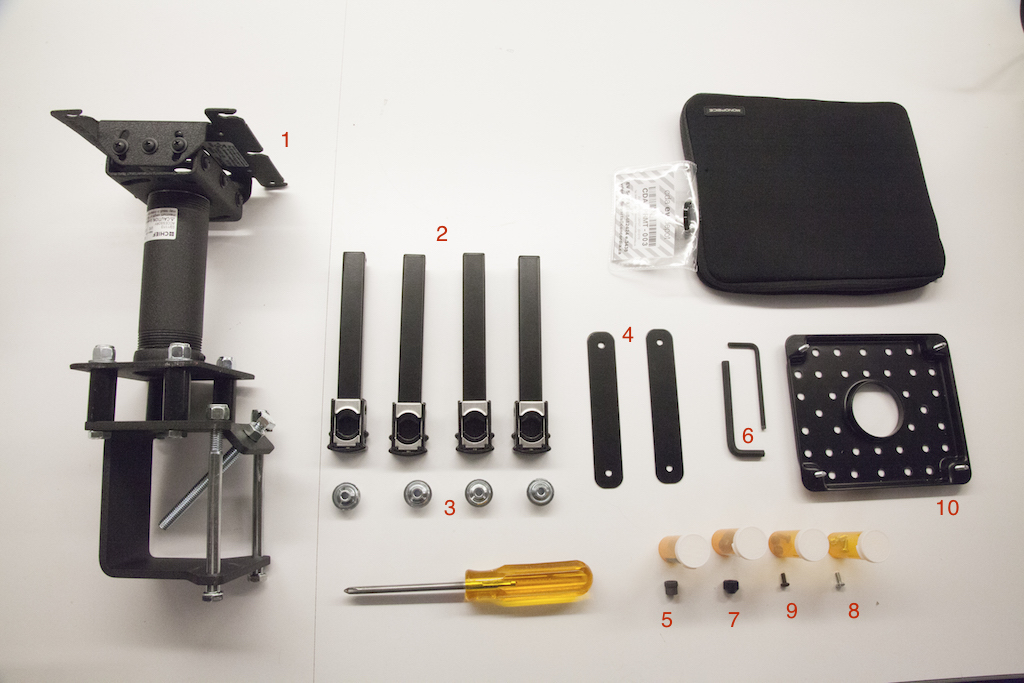
Mount Kit Contents
1- C-Clamp with Pole and mount (x1)
2- Legs (x4)
3- Screw adapters(x4)
4- Security cover bracket (x2)
5- Allen Nuts (x4)
6- Allen keys (x2)
7- Thumb nuts (x4)
8- Projector screws (x4)
9- Security screws (x4)
10- Plate (x1)
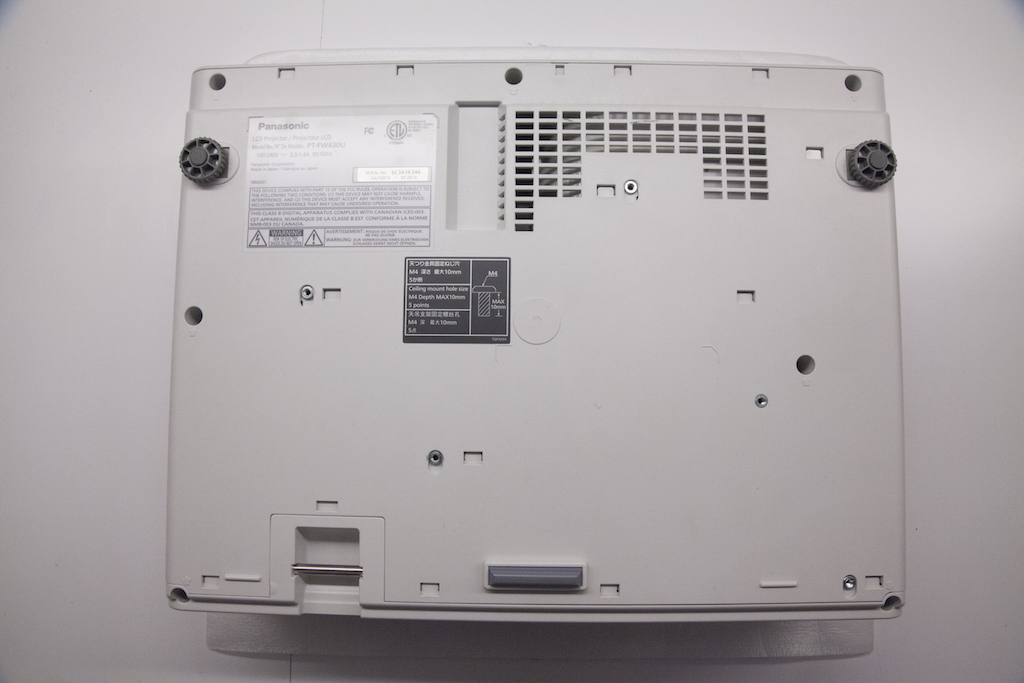
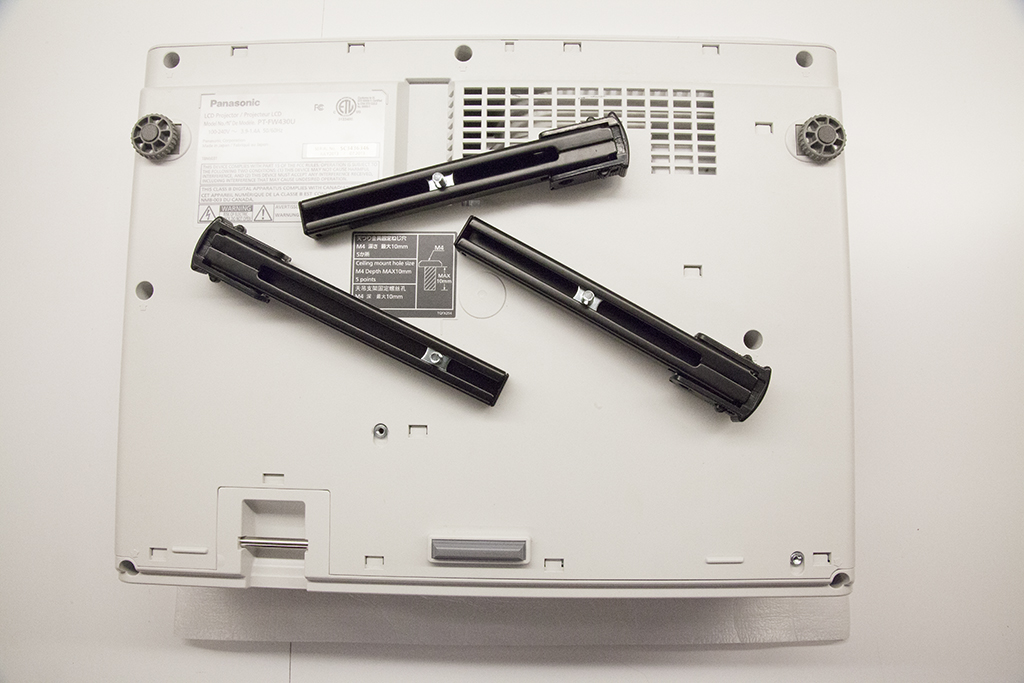
STEP 1
Place the projector upsidedown on a clean flat surface
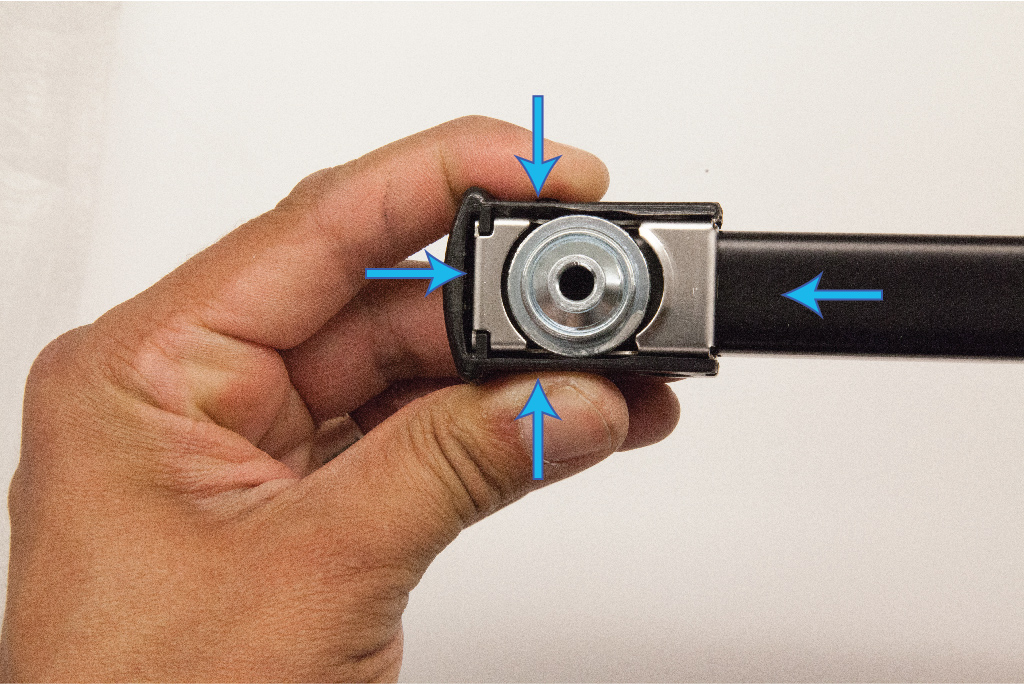
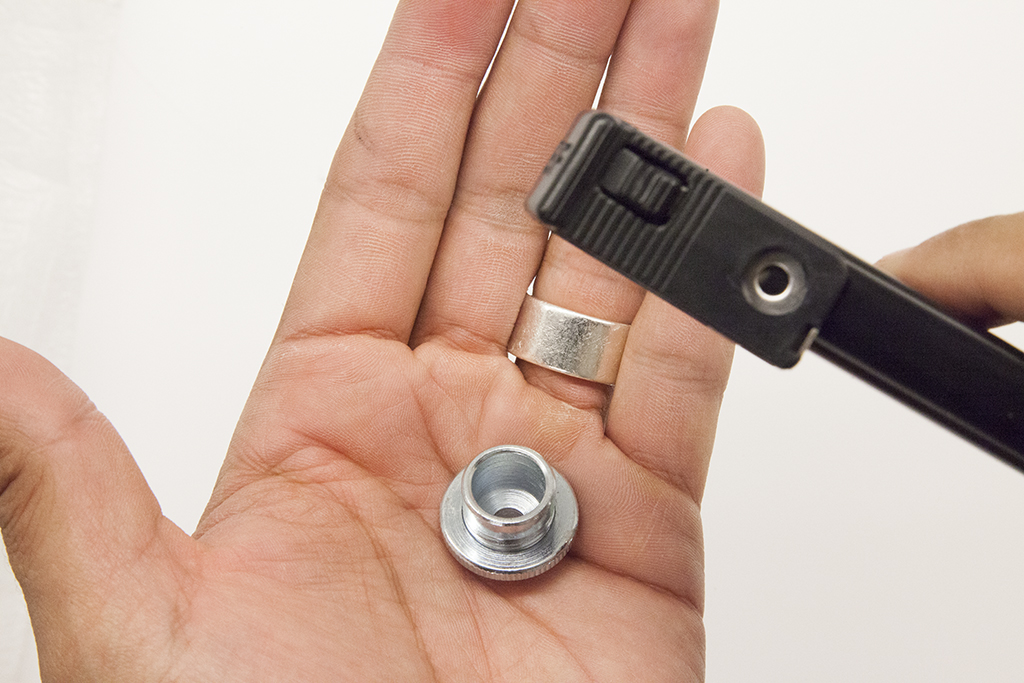
STEP 2
Remove the screw adaptors from the legs by firmly pressing the lock buttons and simultaneously push clip cover towards the leg
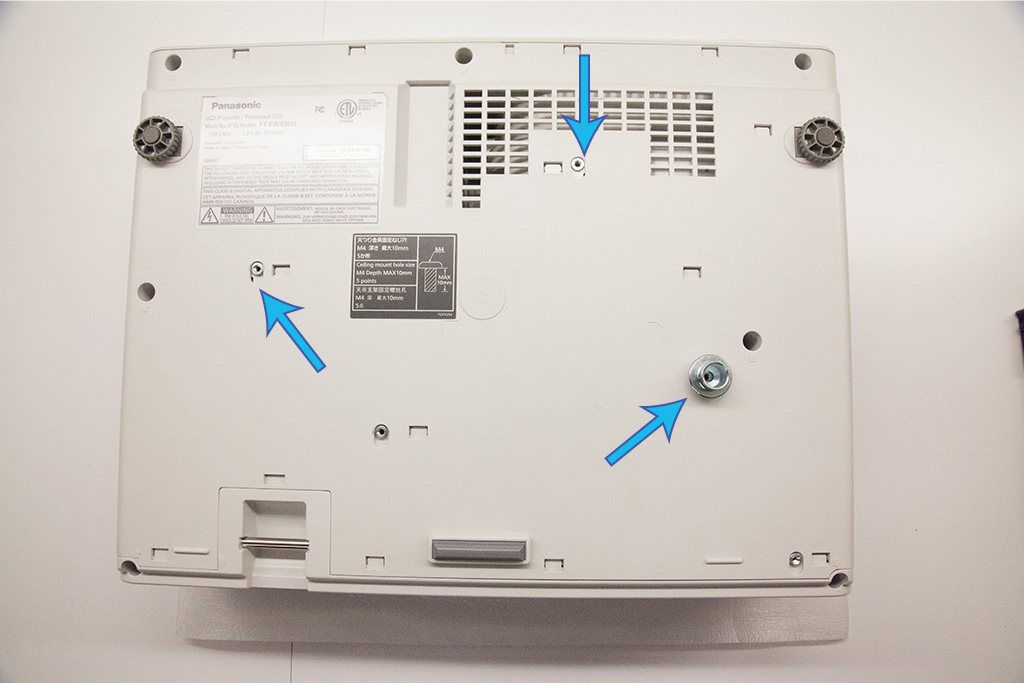
STEP 3
Place the screw adapters on the indicated screw threads
STEP 4
Lock the adapters to the projector using the projector screws

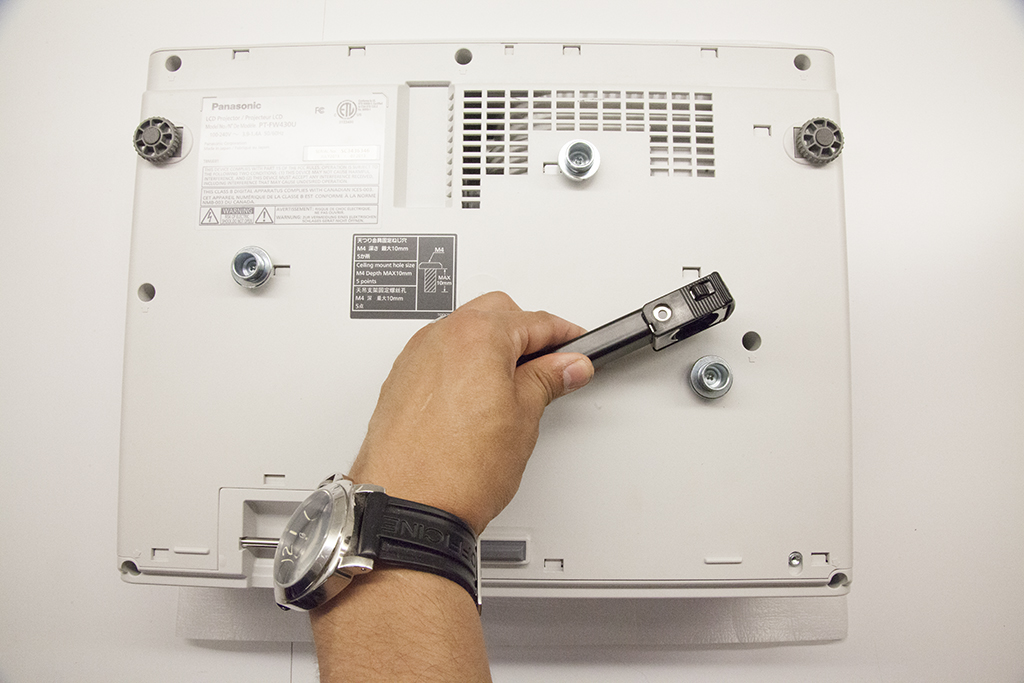
STEP 5
Place the legs on the screw adapters
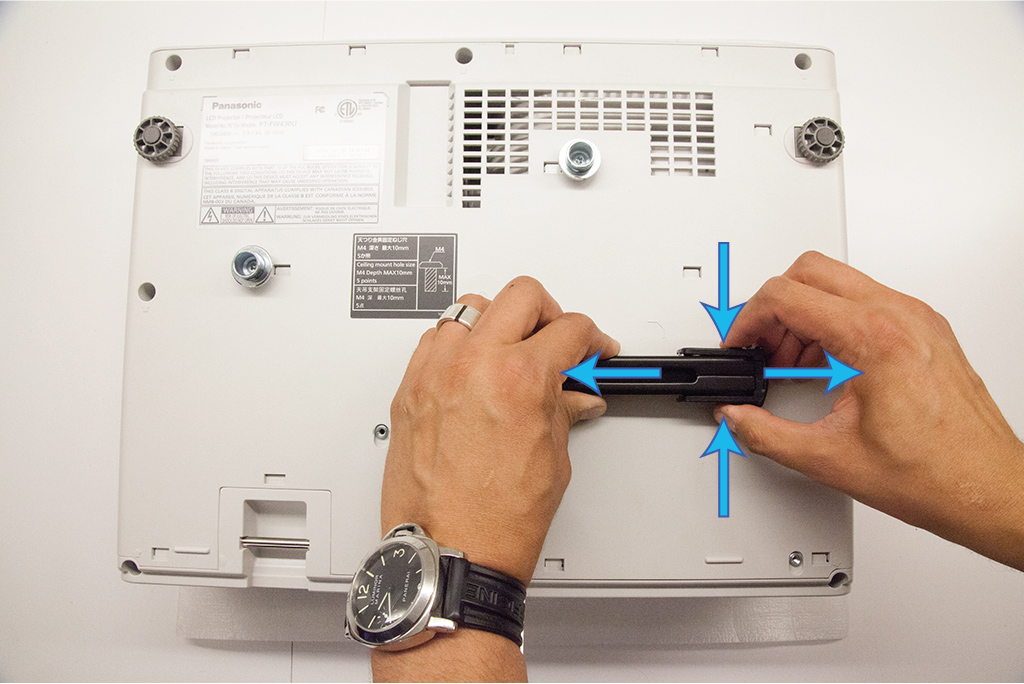
STEP 6
Lock the screw adapter by firmly pushing clip cover away from the leg until clip cover is in the locked position.
WARNING: Make sure legs have securely locked onto screw adapters. If the legs are not properly locked onto the adapters, the projector could fall from the mount.
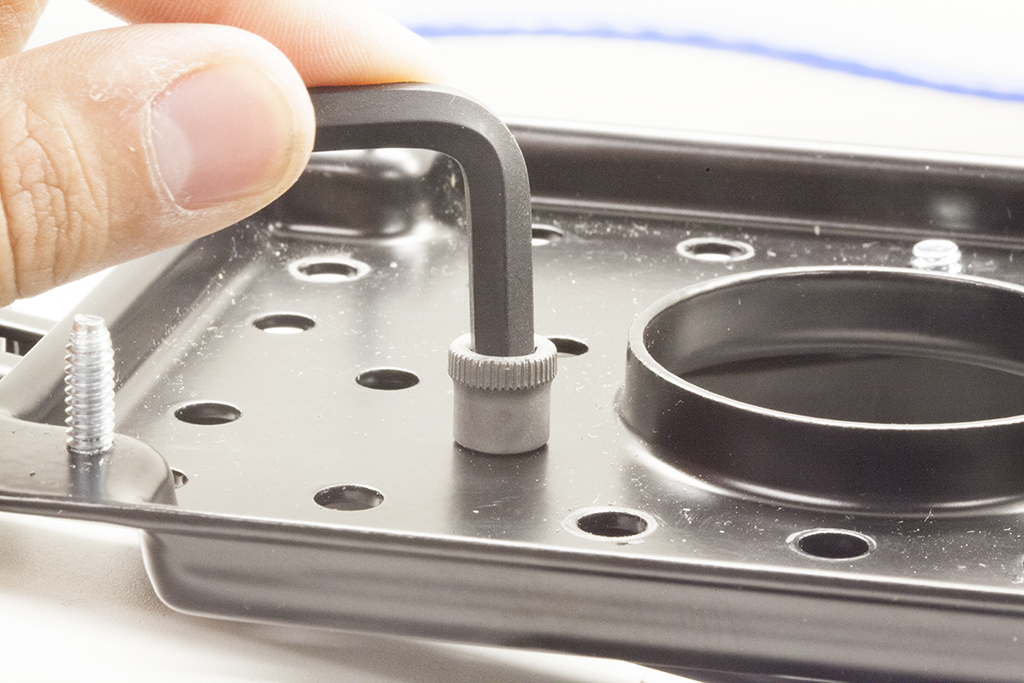
STEP 7
Using the security allen key, lock the legs with the security screws

STEP 8
Rotate the legs to the configuration shown bellow
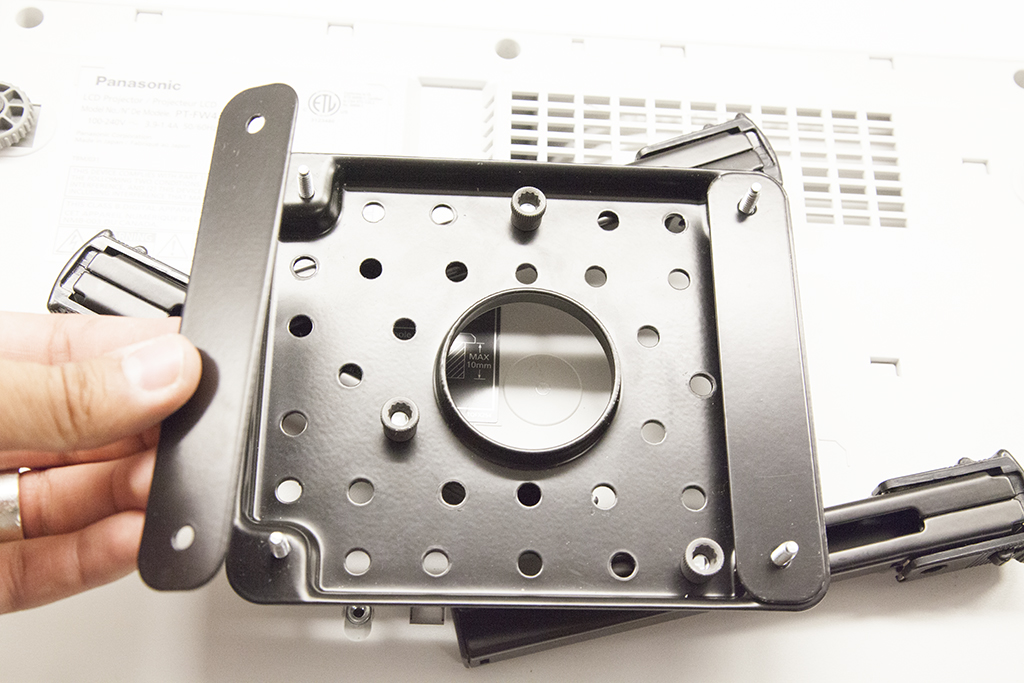
STEP 9
Place the plate on top of the legs. Pass leg's the stud mounts through the plate opennings.
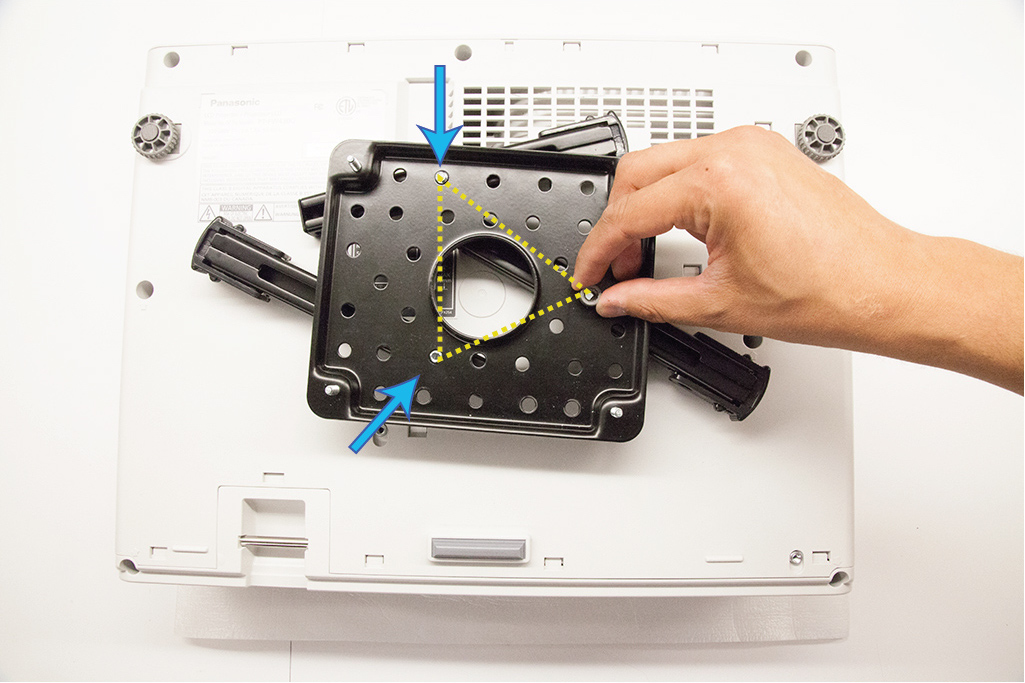
STEP 10
Secure the legs to the plate using the allen nuts. Do not tighten them yet.
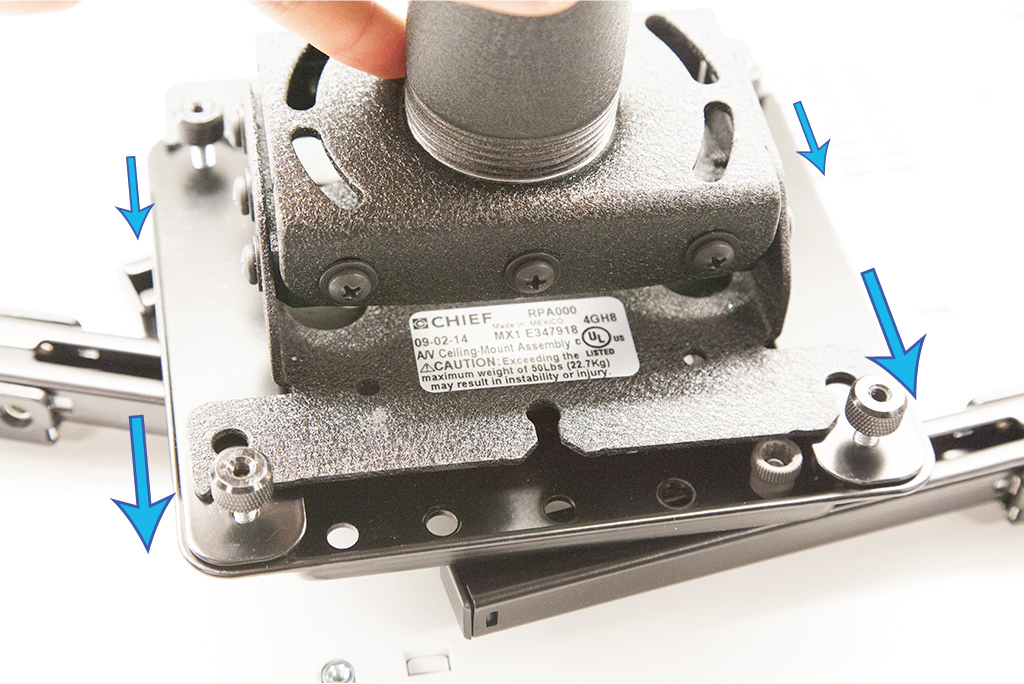
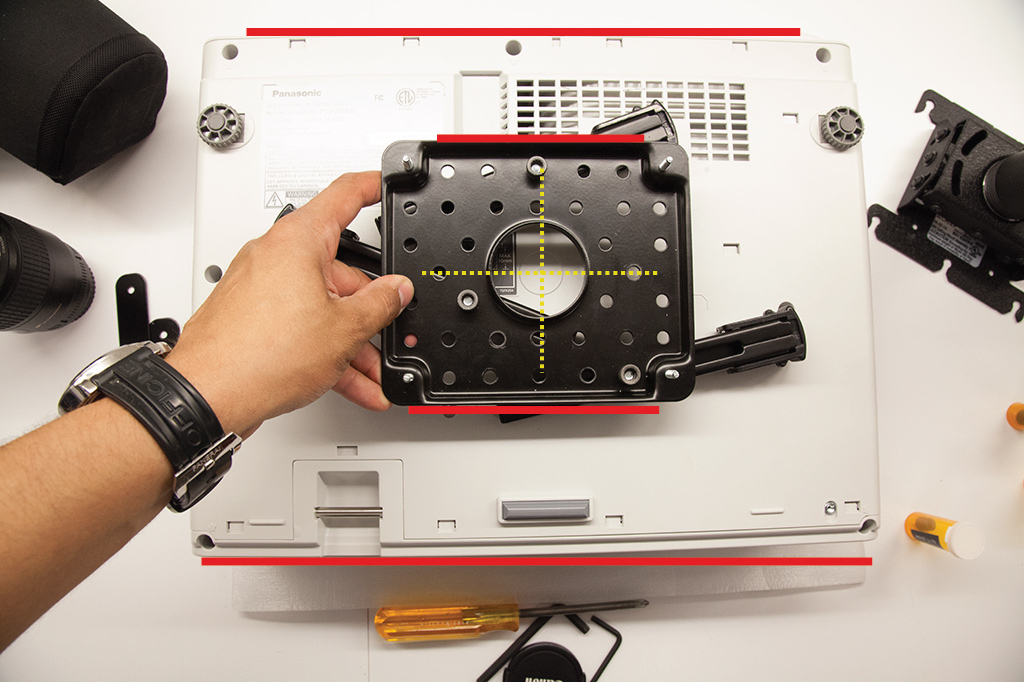
STEP 11
Move the plate until is centered to the projector and its sides are parallel to the projector sides.
STEP 12
Tighten the allen nuts using the second allen key
STEP 13
Place the security covers
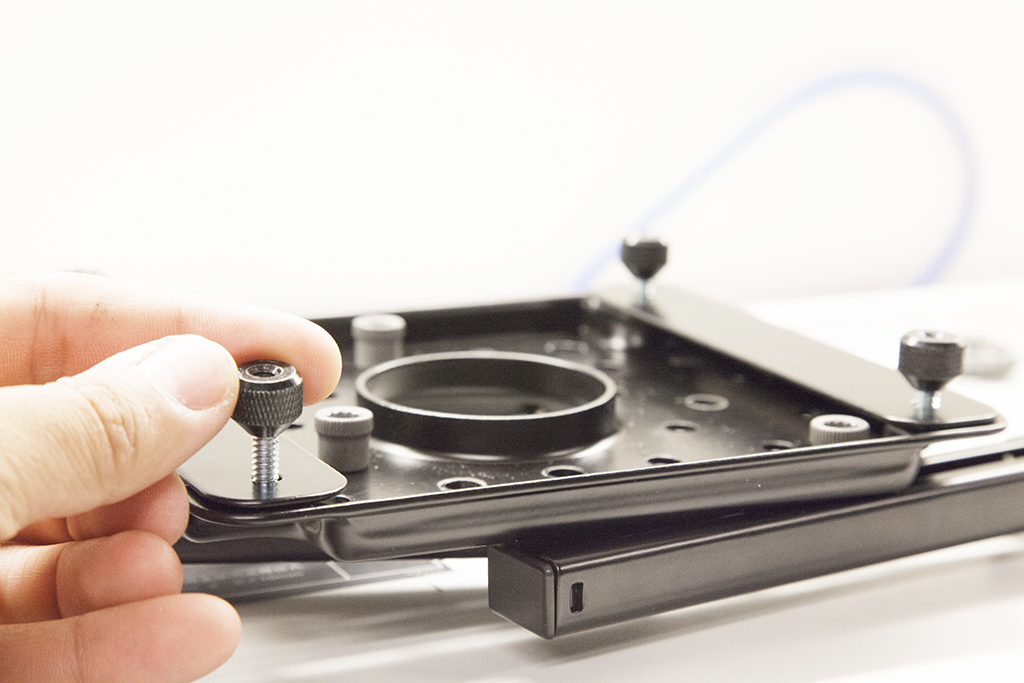
STEP 14
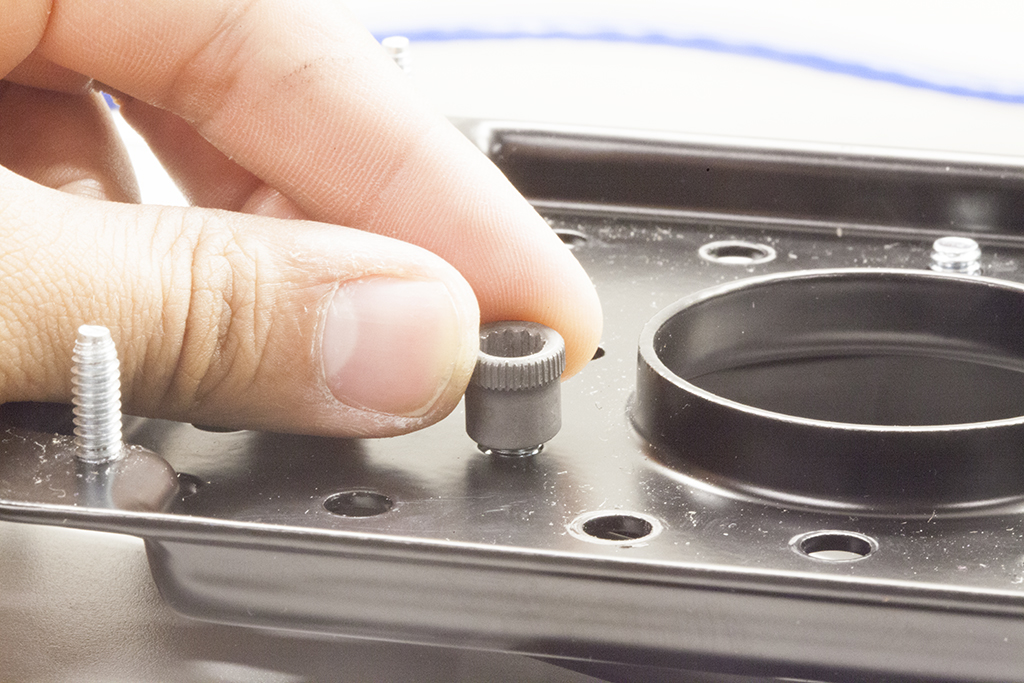
Insert the Thumb nuts half the way into the plate's posts.
STEP 15
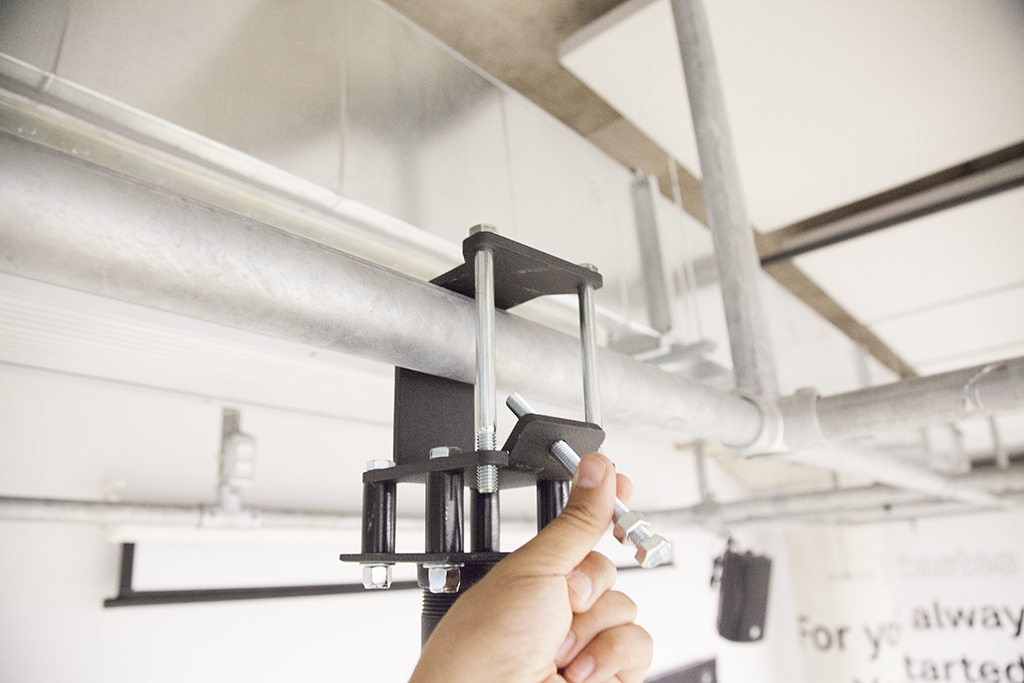
To Place the C-clamp on the lighting grid.
- Remove the nuts and bolts
- Place the C-clamp on the grid
- Re-insert the bolts and secure them with the nuts
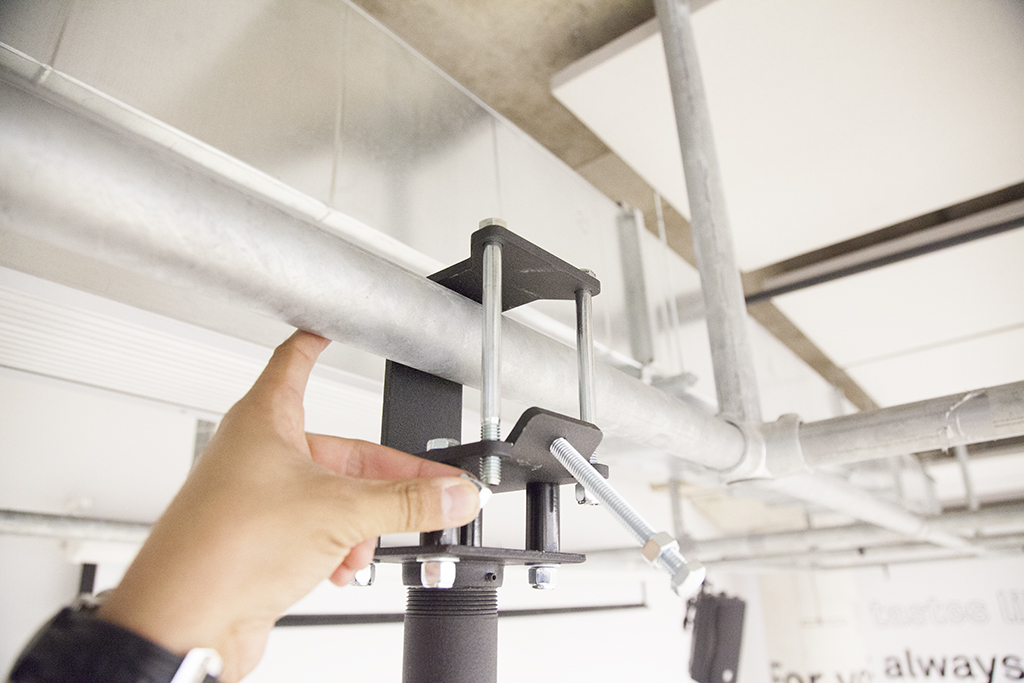
STEP 16
Tighten the screw against the grid's pole
STEP 17
Tighten the nut to secure the screw in place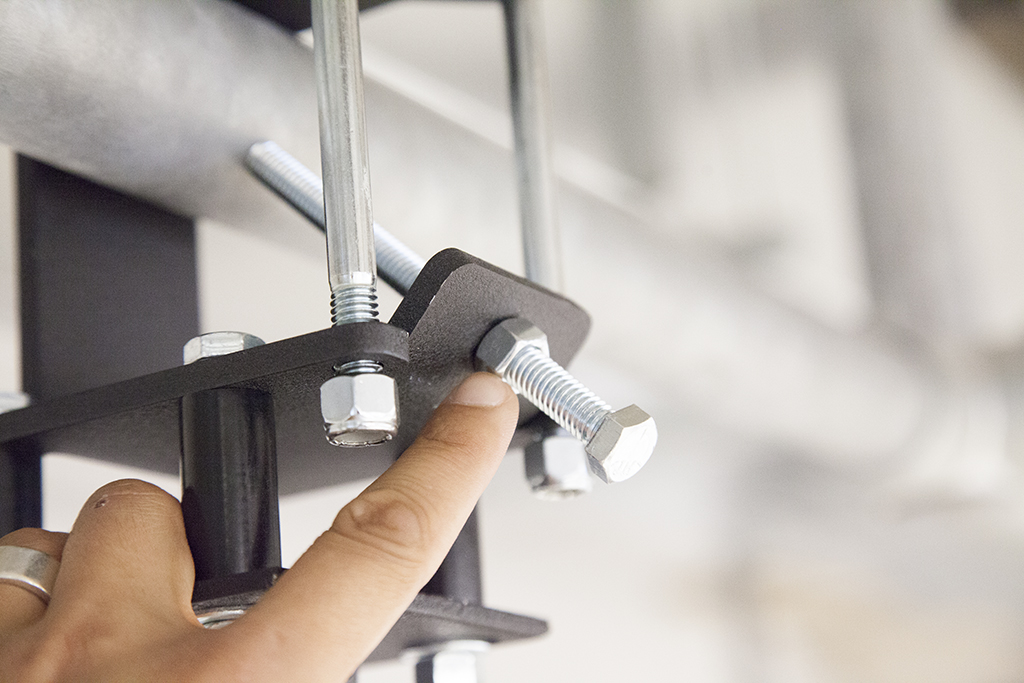
STEP 18
Bring the projector and slide it in so that the thumb nuts rest on the mount.
Firmly tighten the thumb nuts with your fingers