Creating instructional videos from a mobile or tablet
Last updated: July 18, 2023, 8:57 a.m.
Recording videos from your mobile device
It is possible upload any video from your mobile device directly with YuJa using their mobilie app. This means the possiblities for the kinds of content you create are endless.
Recording video using your mobile device
Using your forward-facing camera, there are lot of things you can record that might be relevant for your course. These include:
- experiments you do at home or in a lab
- simulation
- demontrations
- videos of wilfdlife, plant life, etc.
- video of you giving a shor talk or lecture without slides (using a tripod or with your mobile device propped up on something)
Before you begin:
- You have a functioning iPhone
- Your device is an iPhone 6 or later
- Your device is charged
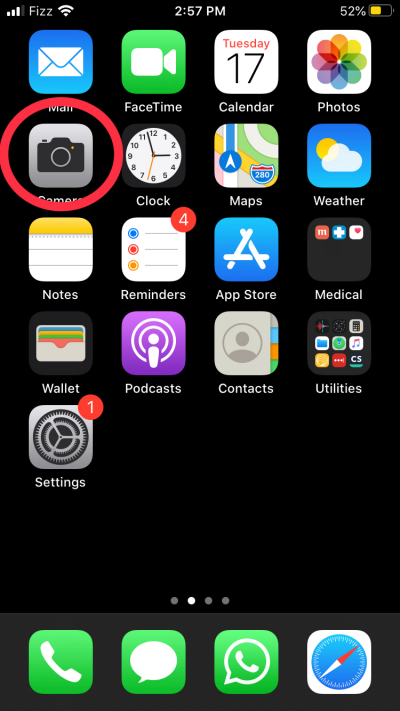
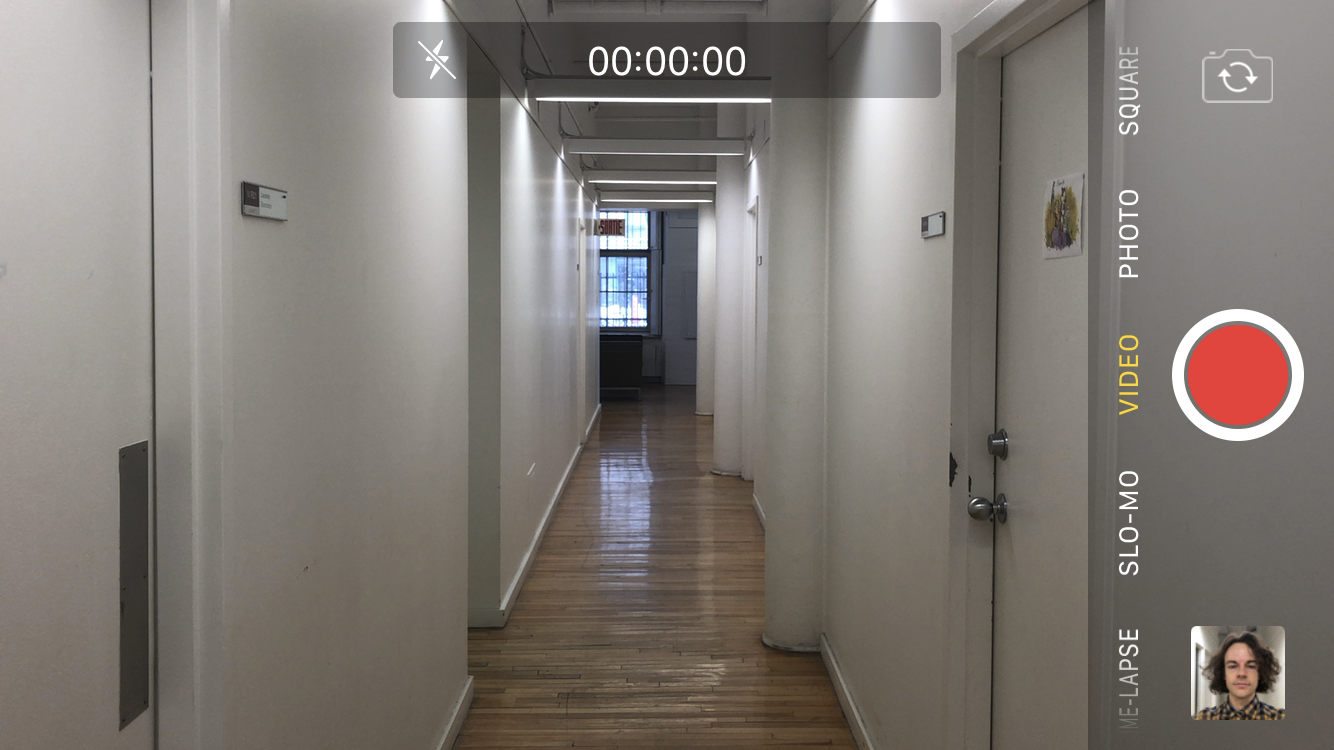
Step 1: Tap the Camera icon on your screen
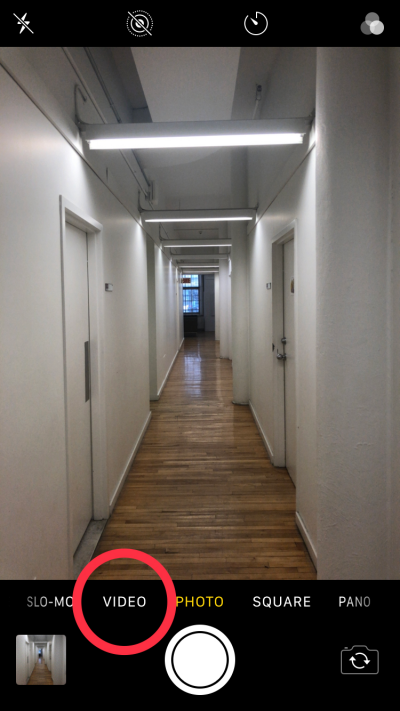
Step 2: Inside the camera app, tap VIDEO
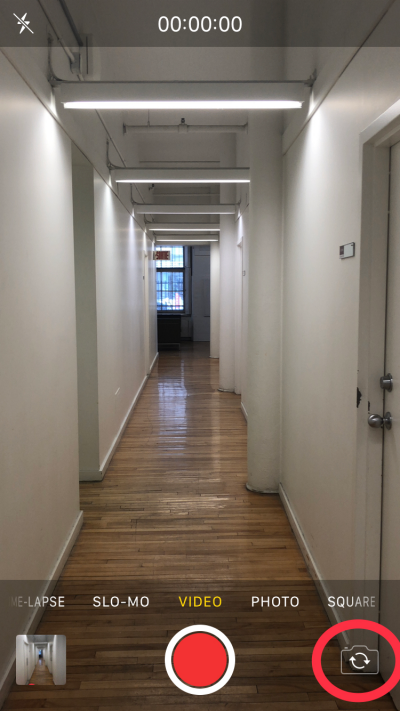
Step 3: Tap the Flip Camera icon in the bottom-right corner of the screen to switch between the front- and rear-facing cameras. You can use the front-facing camera to record yourself speaking or the rear-facing camera to record an object in front of you.
Step 4: Tap the Record button to start recording a video
Step 5: Tap the Record button again to stop the recording
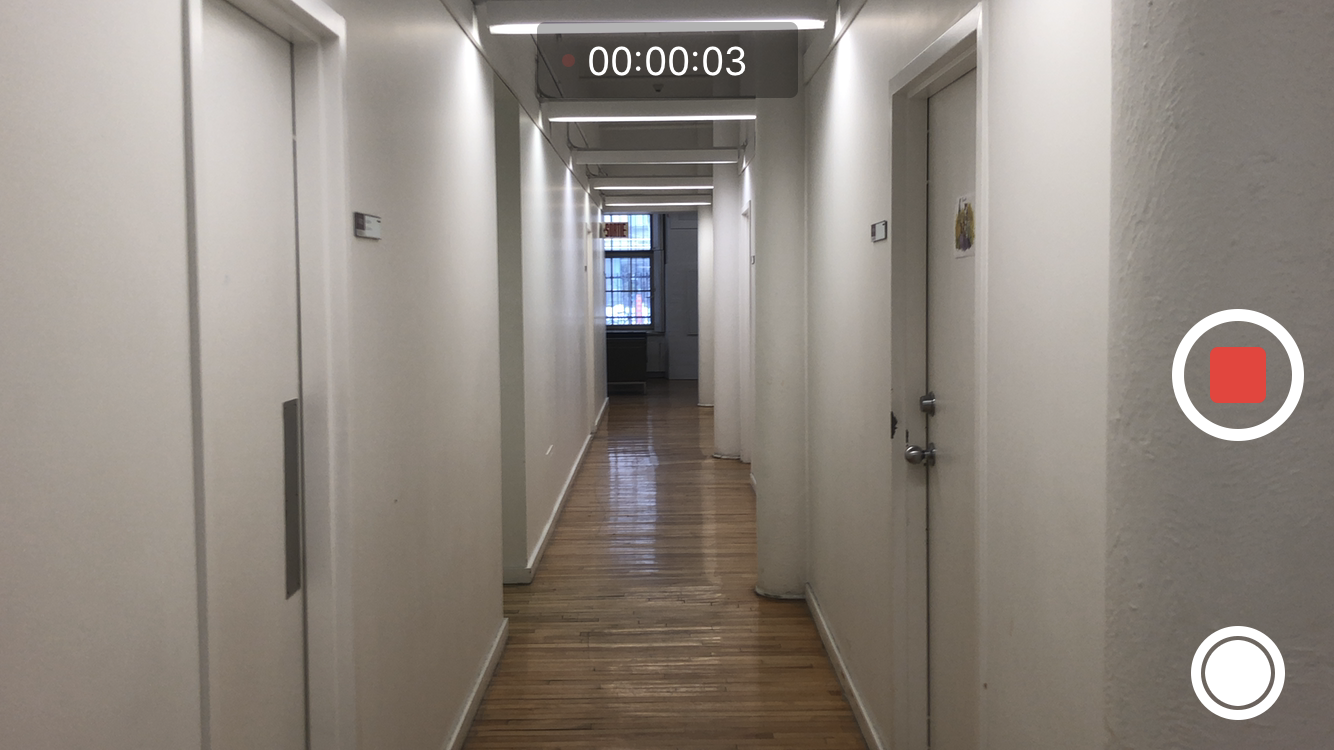
Step 6: Tap the picture at the bottom left-corner to access your library and review your video
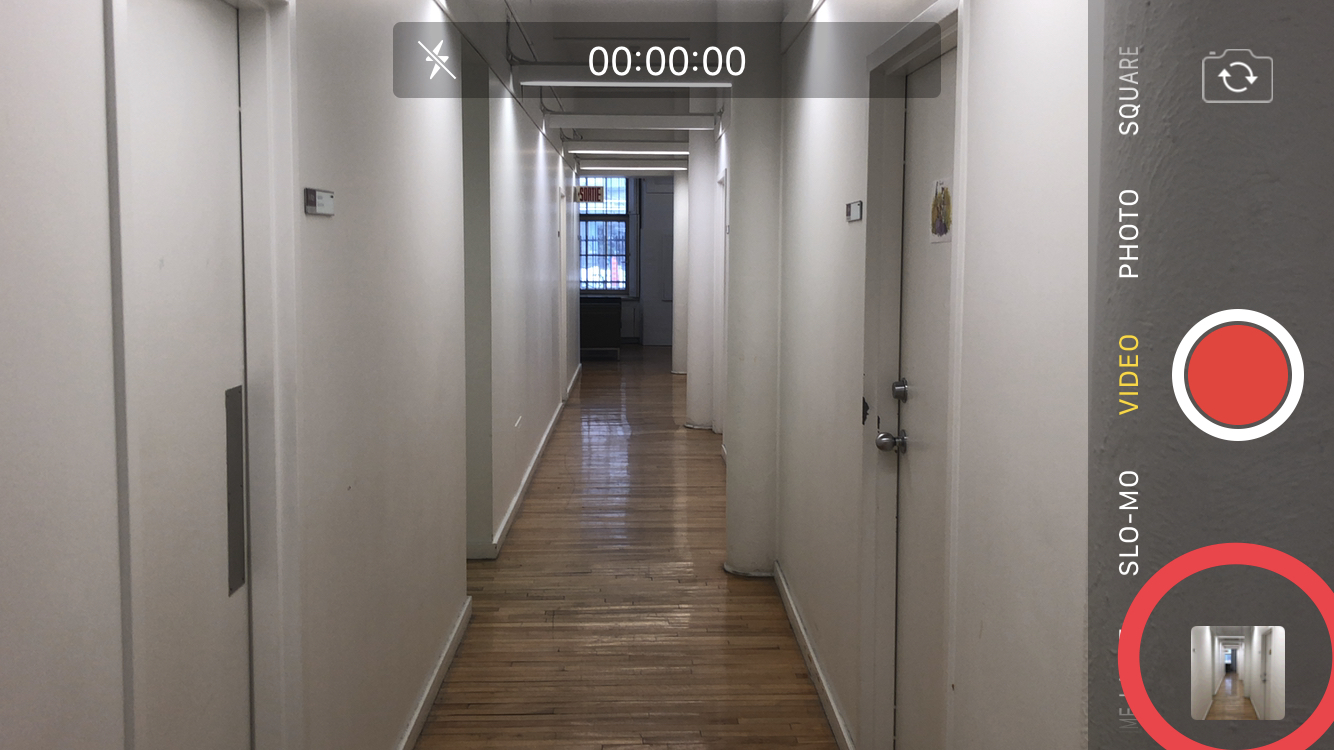
Your iPhone automatically saves videos you have shot through the iPhone Camera. To access your videos, go to your Photos app, tap on Albums at the bottom of your screen, scroll down to Media Types and click Videos
Please note there may be some minor variation to the instructions below, depending on the make of your phone.
Before you begin
Make sure that the battery of your phone has sufficient charge, and there is enough memory space for recording on your phone. You can delete some files or upload them to your cloud drive before deleting.
Now, follow these steps:
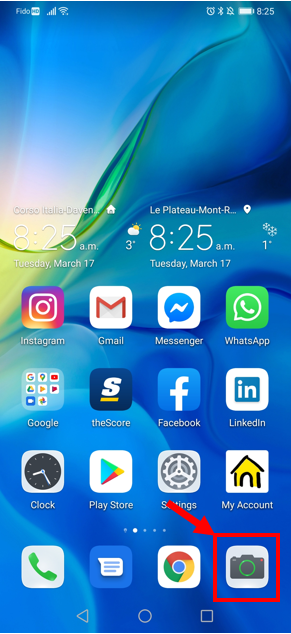
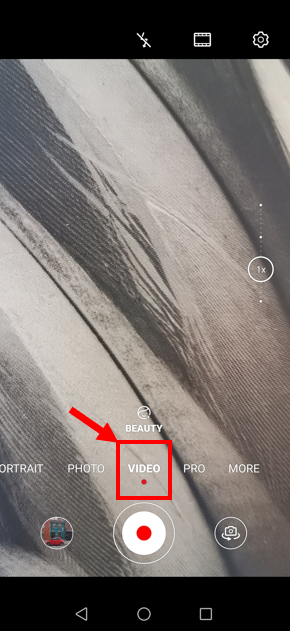
1. Open the camera application on your phone.
2. Select video mode to switch from camera mode to video recording in the application.
Note: When you open the camera app, you will see the default photo mode.
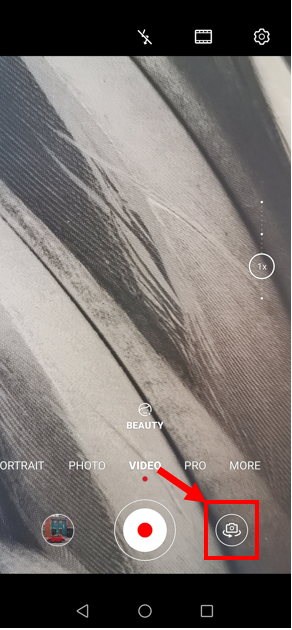
3. Press the camera flip icon to switch between the rear camera (e.g. to record an object in front of you) or front camera (e.g. to record yourself speaking).
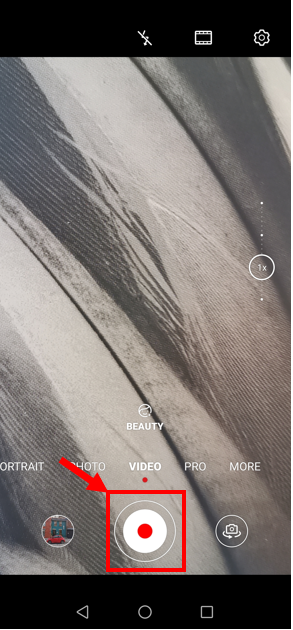
4. Press the record button to start recording video (audio is automatically activated, so it will capture sound in the video recording including your voice if you speak).
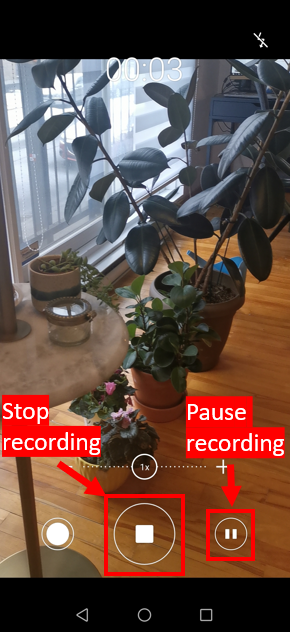
5. Press the stop icon to stop recording video. The video will be automatically saved in the phone’s internal storage.
Note: Press the pause icon at any time to pause the video recording (press the play icon to continue recording).
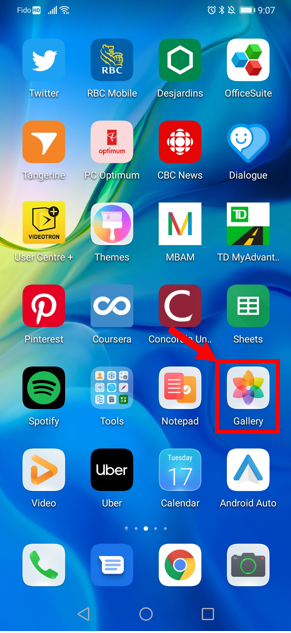
6. Open the gallery or photos application to access video recording.
Recording a video of your mobile screen
It is also possible (with certain devices) to record your voice and anything on your mobile screen. This means, you can record your voice over you using certain apps. This may be particularly useful if you want to annotate slides and documents or write out equations and/or notes. Most tables can accommodate the use of a basic stylus for writing on the screen while some offer options for Bluetooth "pencils." Examples of these kinds of video include:
- worked problems (talking through mathematical or other types of problems as you go along)
- presentations with annotations (i.e. marking up PowerPoint slides or other documents while lecturing)
When using using the function to record screen, you can use any app. For example, you can use PowerPoint or other presentation apps, note-taking apps (with blank, lined or graph paper) for writing out problems and solutions or drawing diagrams. It's best to work with apps that you are already familiar with.
Equipment needed:
In iOS 11 or later, you can create a screen recording and capture sound on your iPhone.
When to use it:
You want to record your lecture using your iPhone and display something on your iPhone such as slides, or lecture notes.
Instructions:
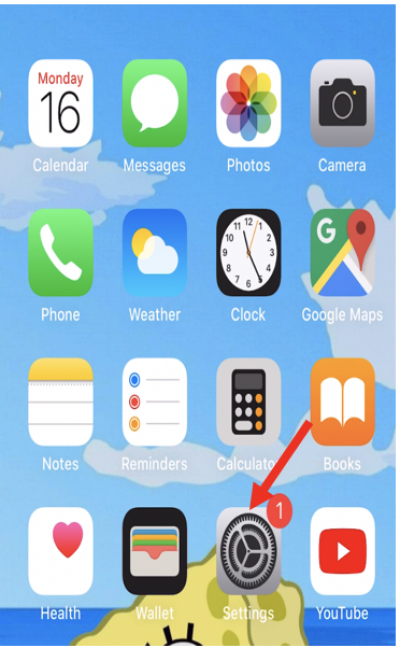
1. On the main iPhone screen, tap Settings
You will find the Settings icon, which looks like a gear, on the first page of your iPhone screen
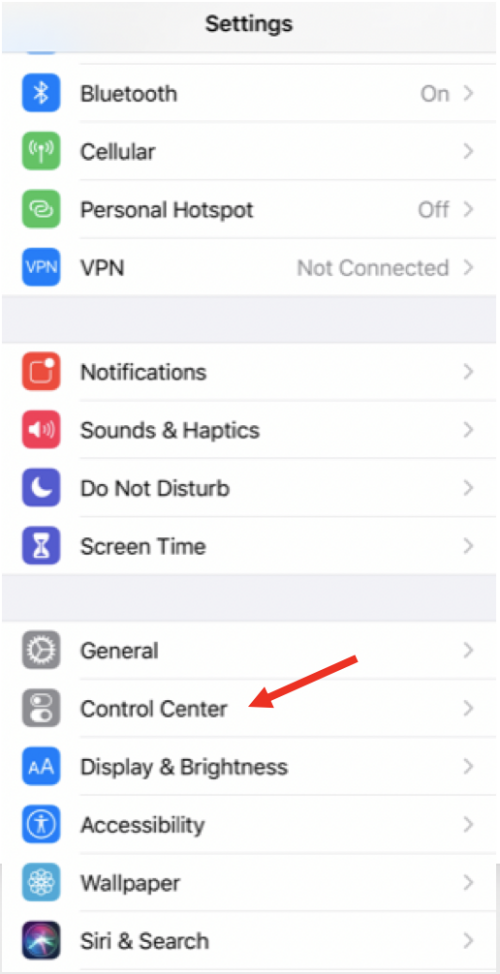
2. Scroll down and tap on Control Center
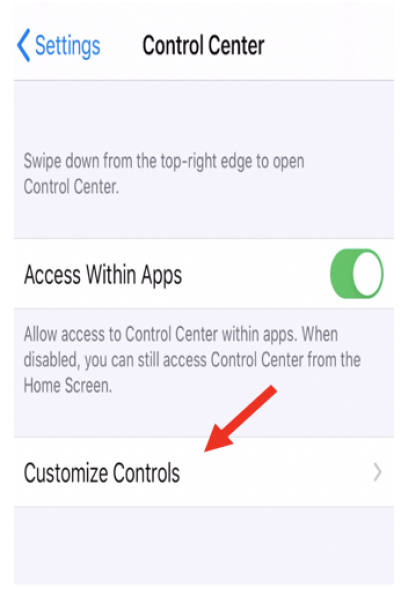
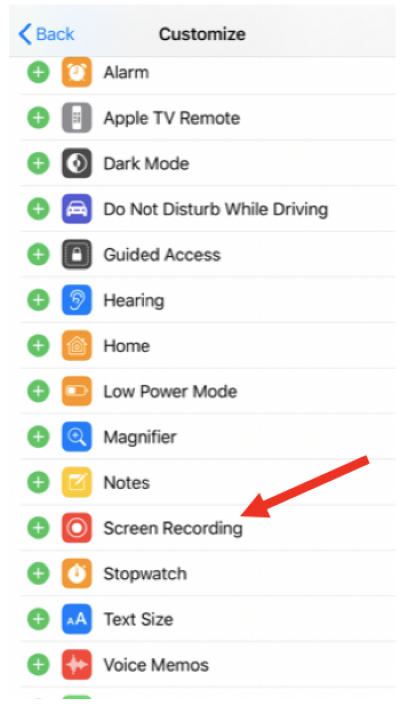
3. Tap on Customize Controls
4. Tap on the green plus icon next to Screen Recording
5. Return home and open the files or slides you want to show to your audience
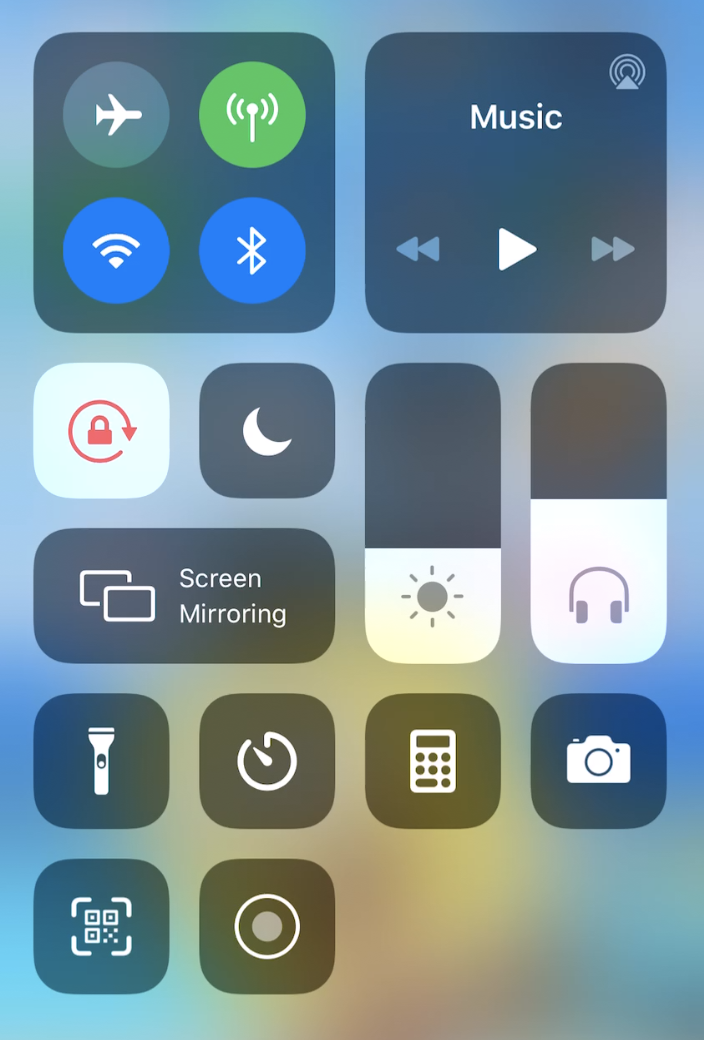
6. After the files or slides are open, swipe up from the bottom edge of the screen (On iPhone X or later swipe down from the upper-right corner of the screen) to go to the Control Center
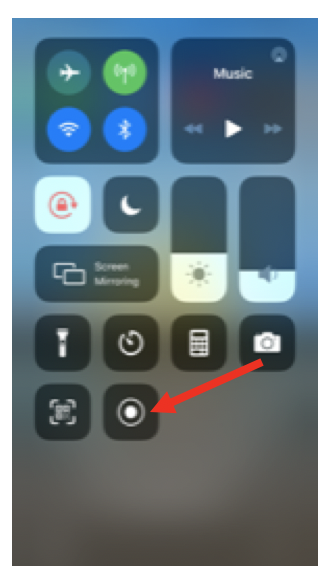
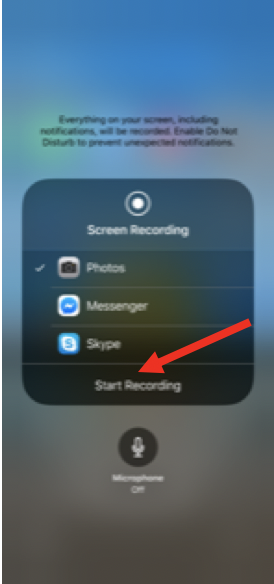
7. Hold the Record button to change the recording settings. Tap on Microphone to turn on the iPhone’s microphone for recording.
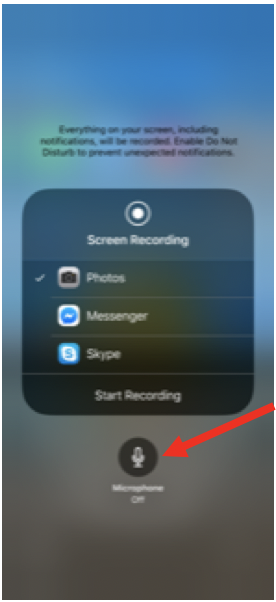
8. Click on Start Recording to start recording your iPhone screen. (Remember to go back to the files you want to show to your audience)
To return to your files, tap the screen away from recording settings, and then tap the screen again away from any ‘Control Center’ buttons
Note: There is a 3 seconds countdown and after that the screen starts recording (you'll see the status bar turning to red).
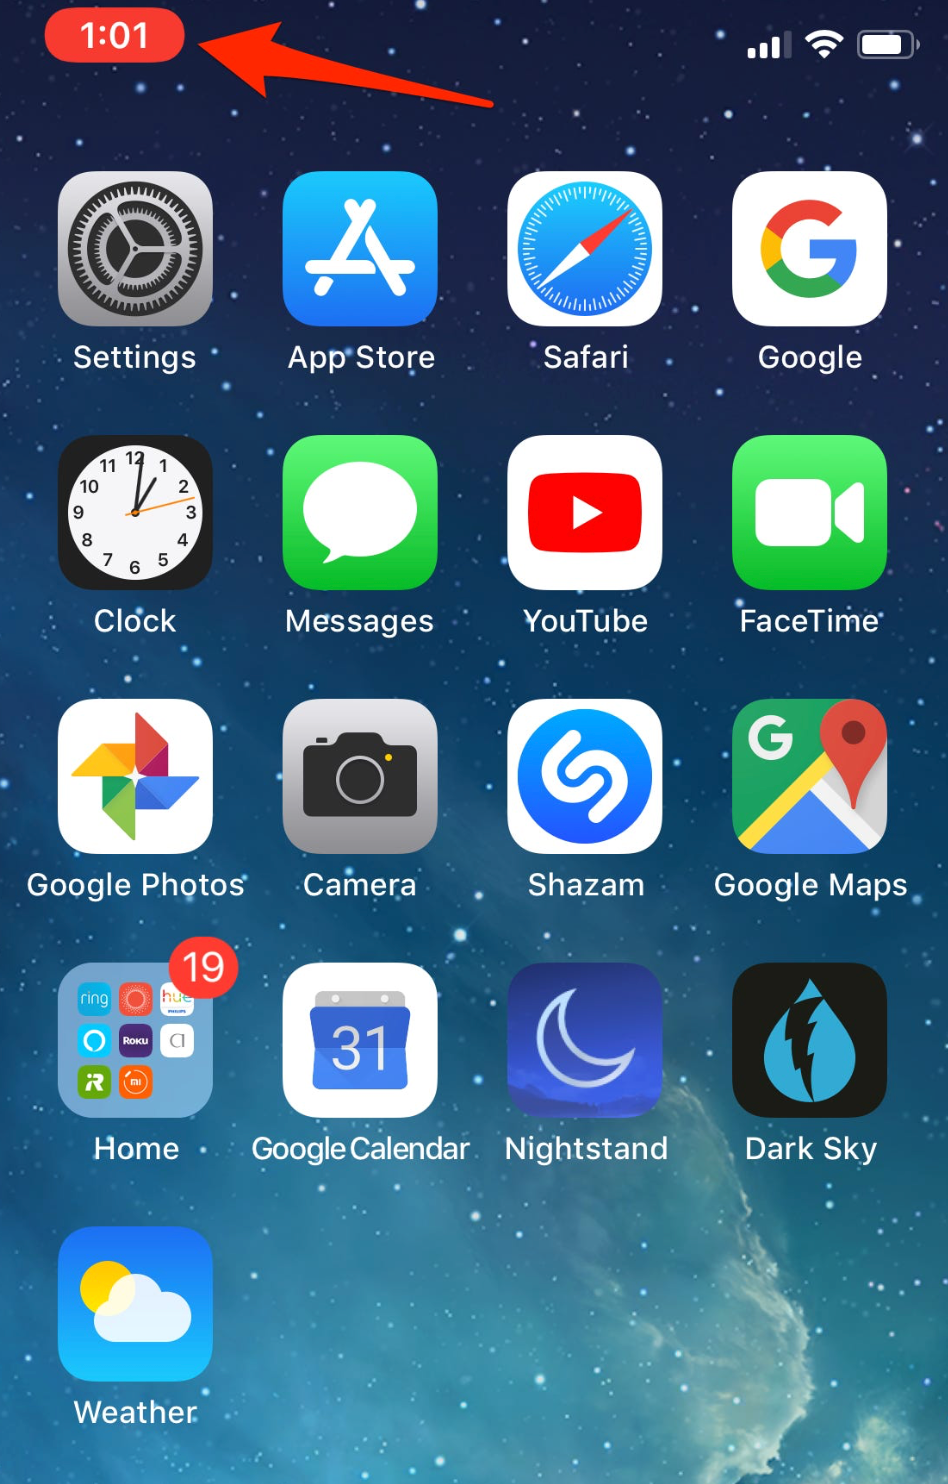
9. To stop recording, tap the red status bar at the top left-corner of your screen, then tap Stop.
10. Your recording will then be stored in the Photos app.
Your iPhone automatically saves your videos. To access your videos, go to your Photos app, tap on Albums at the bottom of your screen, scroll down to Media Types and click Videos.
iOS (for iPads and iPhones)
To download YuJa Mobile for iOS:
- Open the App Store on your device.
- In the Search box, type yuja.
- Locate the YuJa Mobile app and click Get.

4. Follow the instructions from the App store to complete installation.
- Depending on your device, you may be required to enter your Apple ID and password, use Touch ID or Face ID with a double click.
- Once downloaded, the app will install on your device.
- Locate the app on yoru device and tap it to open it.
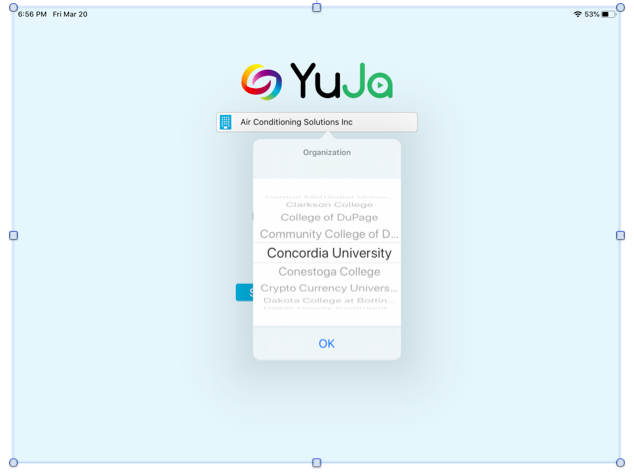
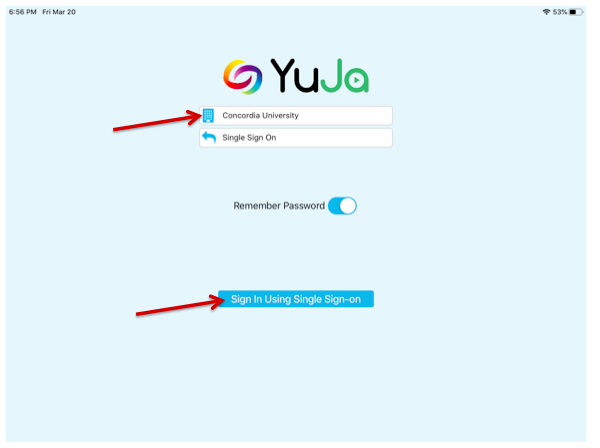
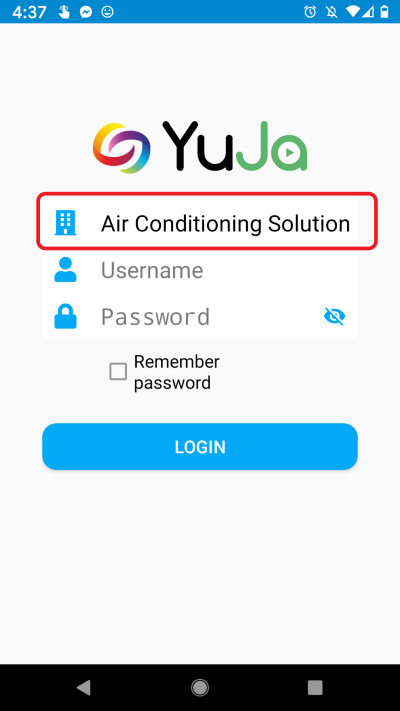
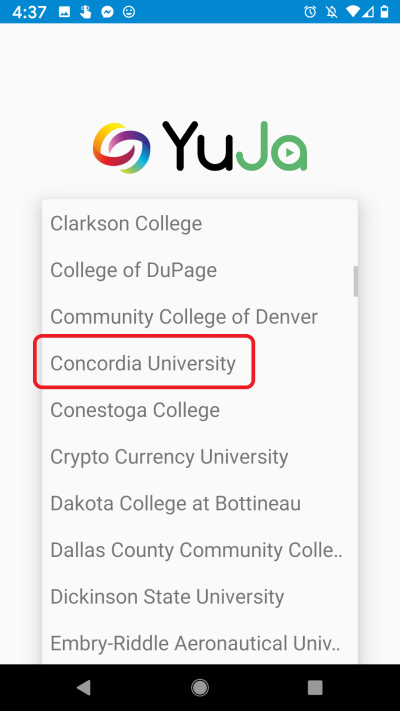
- Above the Single Sign on button, tap the box to select Concordia University from the Oraganization box, and tap OK.
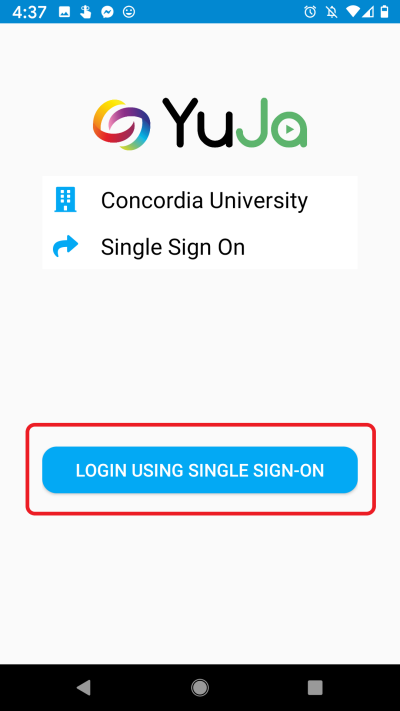
3. Tap the blue Sign in Using Single Sign-on button.
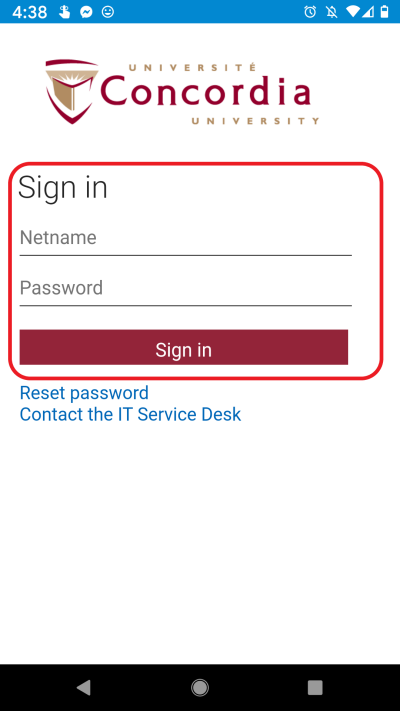
The Concordia University sign in page appears.
4. Login using your netname and password.
5. Tap the Sign in button.
The YuJa app opens displaying your Channels.
Android (for Samsung and Android devices)
Before you can share the video, you must set up your moodle page and yuja channel (see this page for instructions).
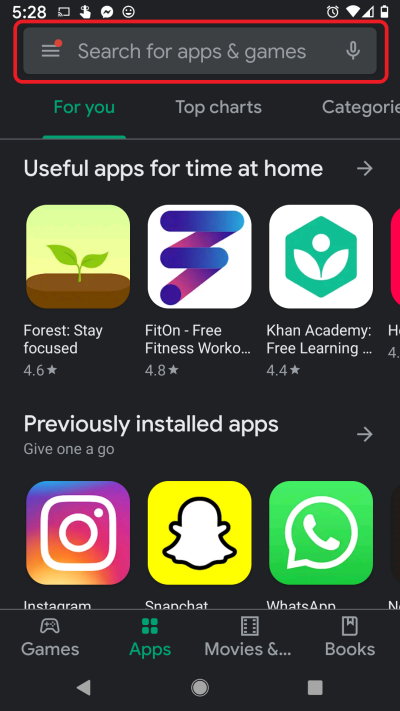
1. From your app menu on your phone, select the Google Play Store.
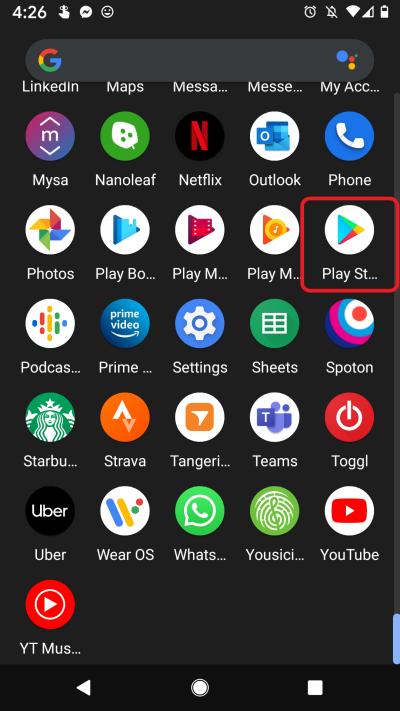
2. Tap the search bar.
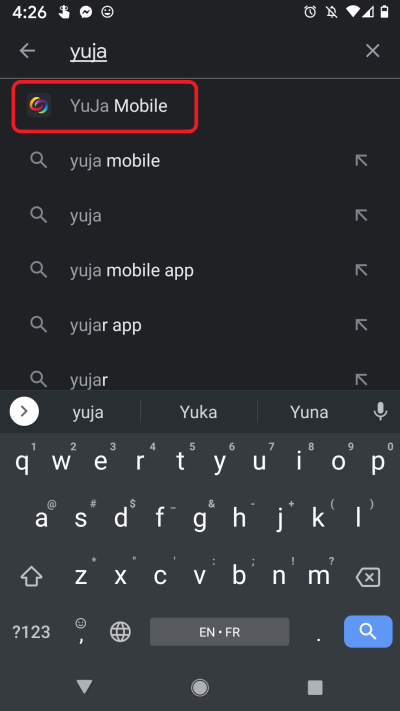
3. Type yuja mobile and select the search result.
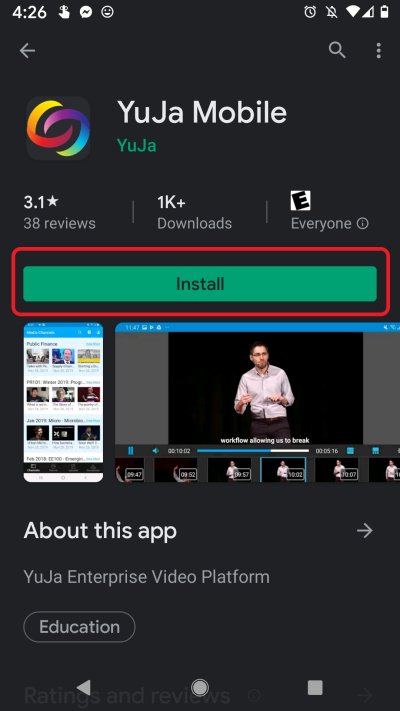
4. Tap install and open the app when it finishes installing.
Uploading your video to YuJa using the App
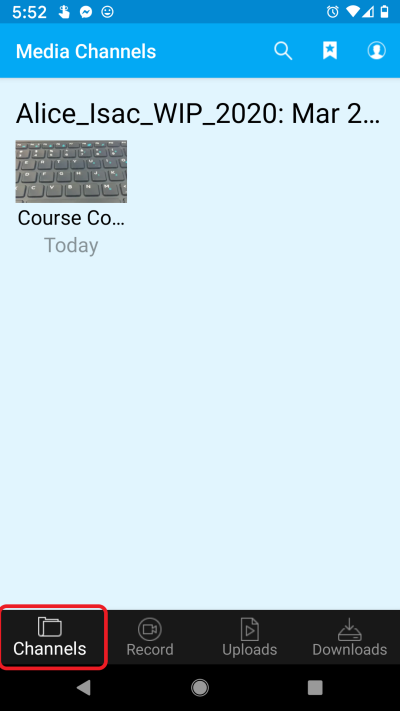
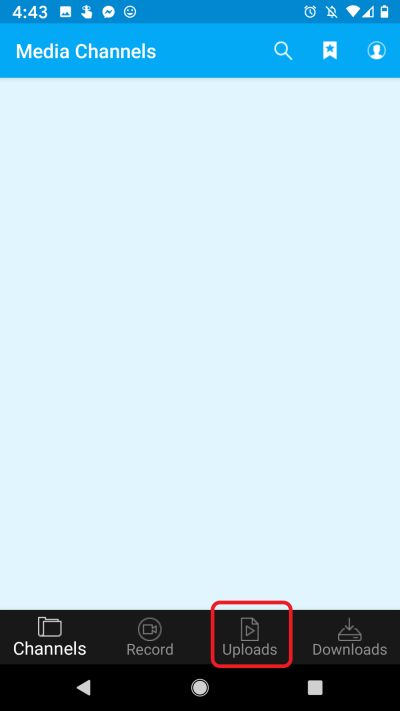
1. Locate the app on your device and tap it to open it.
- The app opens to your Channels foler.
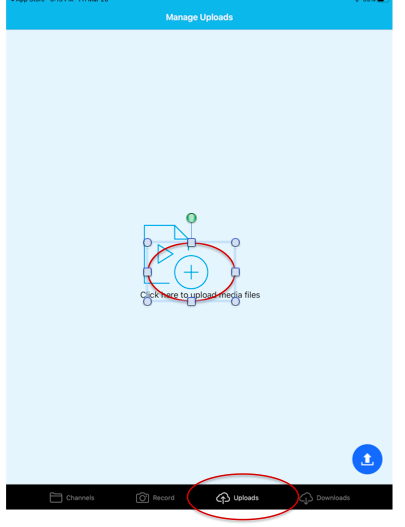
2. At the bottom of the screen, tap Uploads .
The Manage Uploads screen appears.
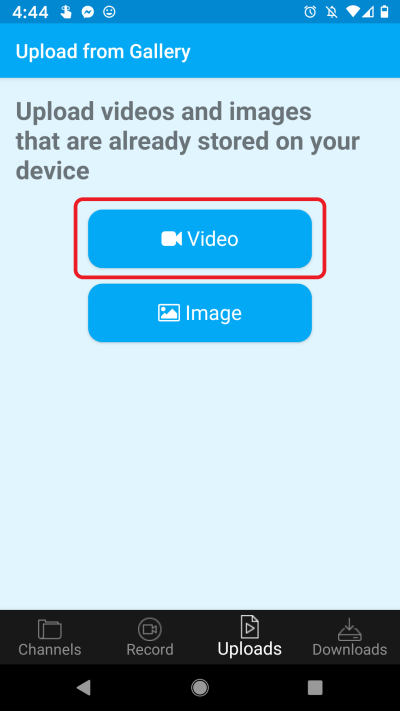
3. Tap the + icon.
The Media Upload screen appears.
4. Tap Upload Video.
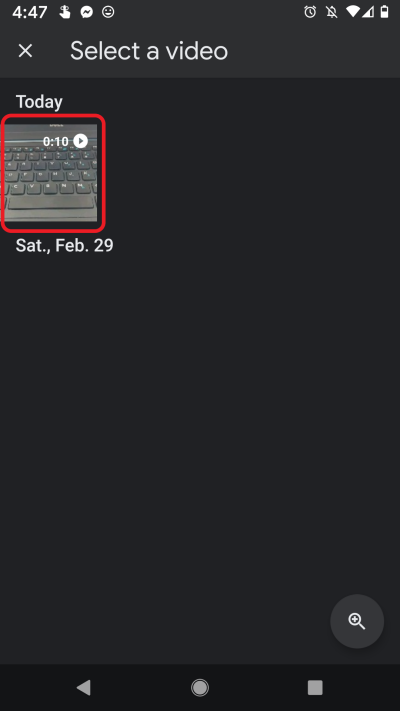
The videos on your device appear in chronological order.
5. Locate the video you want to upload, then tap it.
The Choose video Screen appears.
6. If the correct video is displayed, tap Use in the top right-hand corner.
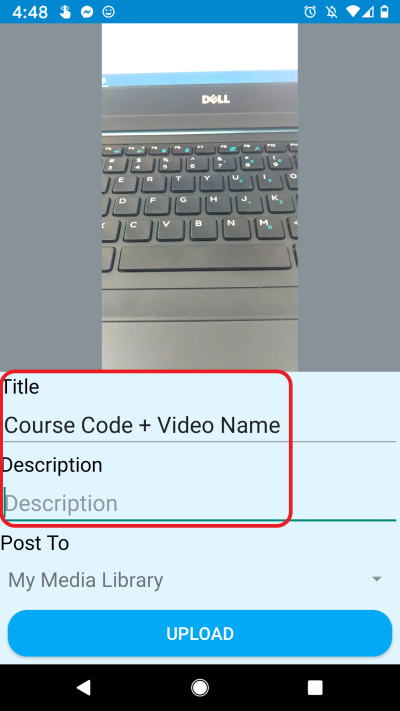
The Upload Media screen appears. By default, the video will be saved to your My Media Library folder.
7. To change the folder, tap My Media Library.
A drop-down menu will all your folders appears.
8. Tap the desired folder by tapping it.
9. Under the Post To save location, type in the name of your video. You can optionally add a description.
10. Tap Upload in the top right-hand corner to begin the upload.
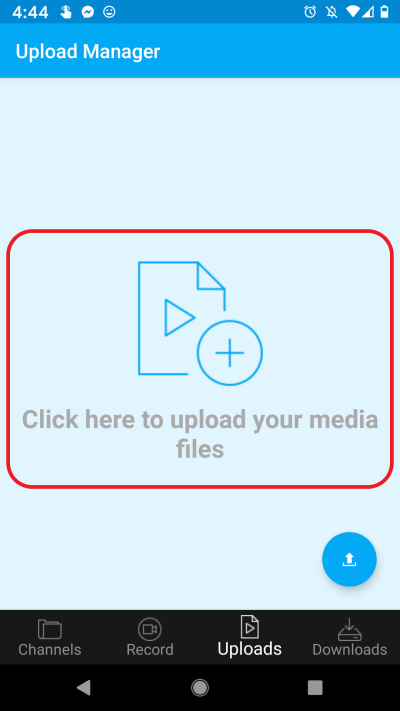
1. Open the YuJa Mobile app.
2. Tap the uploads icon.
3. Tap the middle of the screen to upload your video.
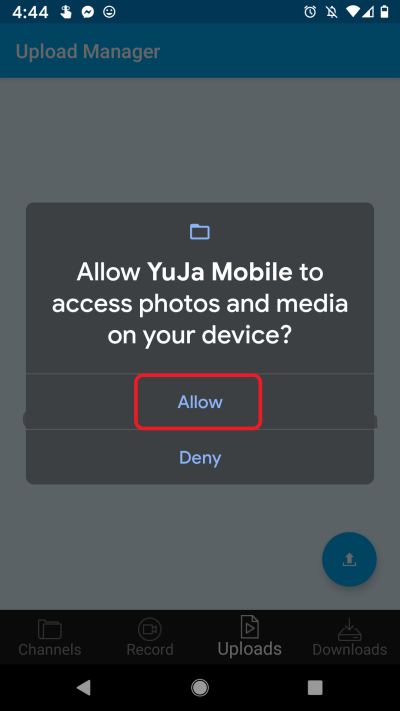
4. Select Allow to give YuJa to access to media on your device.
5. Tap the video button.
6. Select the folder where your video is saved.

7. Select the video.
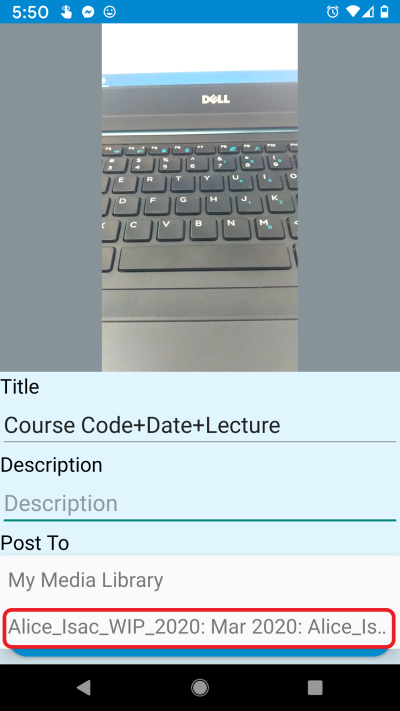
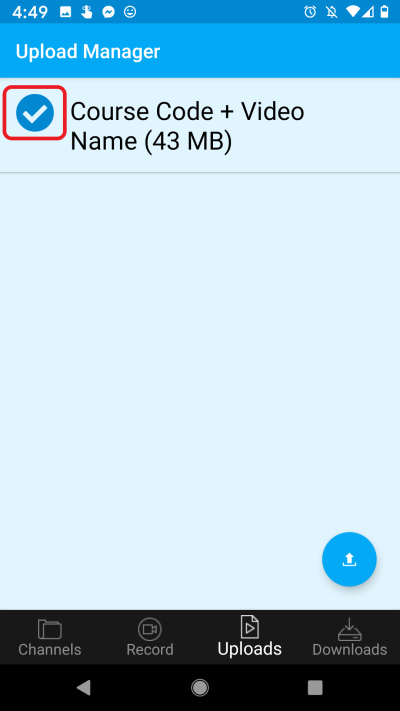
8. In the title field, type the course and a relevant video name. You can also add a description.
9. Select the channel where you would like to post the video, and then tap the upload button.
10. You will see a checkmark next to the video name when the upload is complete.
11. Select to the channels section to confirm that your video was shared to the right channel.